

You don’t have to leave your desk to undo hours of sitting.
Sitting stacks tension into your neck, shoulders, hips, and low back, and tiny tight spots turn into nagging pain fast.
Microbreaks of 20 to 60 seconds every half hour can stop that before it starts.
This post shows simple seated recovery exercises you can do at work—chin tucks, shoulder rolls, ankle pumps, seated cat-cow, and glute squeezes—with reps and holds that fit a busy day.
Do them at your chair and feel circulation, mobility, and energy return without disrupting work.
Immediate Desk-Friendly Recovery Moves for Fast Relief

Sitting all day builds tension that stacks up hour after hour. Most adults sit around 6.5 hours daily, and that much sitting connects to higher blood pressure, wonky blood sugar, and increased cancer risk. Good news? Microbreaks of 20 to 60 seconds every 20 to 30 minutes can stop these patterns before they turn into chronic stiffness or pain.
A 2023 trial showed that walking just 5 minutes every 30 minutes offsets a lot of the metabolic damage from prolonged sitting. But when a walk isn’t realistic, seated recovery moves deliver real relief without leaving your workspace. These movements boost circulation, release muscle tension, and restore joint mobility in the time it takes to send an email.
Most effective desk recovery moves follow a simple framework: 6 to 12 reps for dynamic movements, 10 to 30 second holds for static stretches, and 1 to 3 sets depending on your time. That rhythm keeps things manageable while creating enough stimulus to counteract sitting fatigue.
-
Chin Tucks: 8 to 12 slow reps. Targets deep neck muscles and counters forward head posture. Keep your gaze level and draw your chin straight back without tilting your head.
-
Shoulder Rolls: 10 forward, then 10 backward. Loosens the trapezius and shoulder girdle. Move slowly through the full circle, really squeeze at the top and drop at the bottom.
-
Seated Cat–Cow: 6 to 10 cycles coordinated with breath. Mobilizes your entire spine from neck to low back. Inhale as you arch your chest forward, exhale as you round your upper back.
-
Ankle Pumps: 20 to 30 seconds of continuous pointing and flexing. Reduces pooling in your lower legs and improves alertness. Do both feet at once or alternate if space is tight.
-
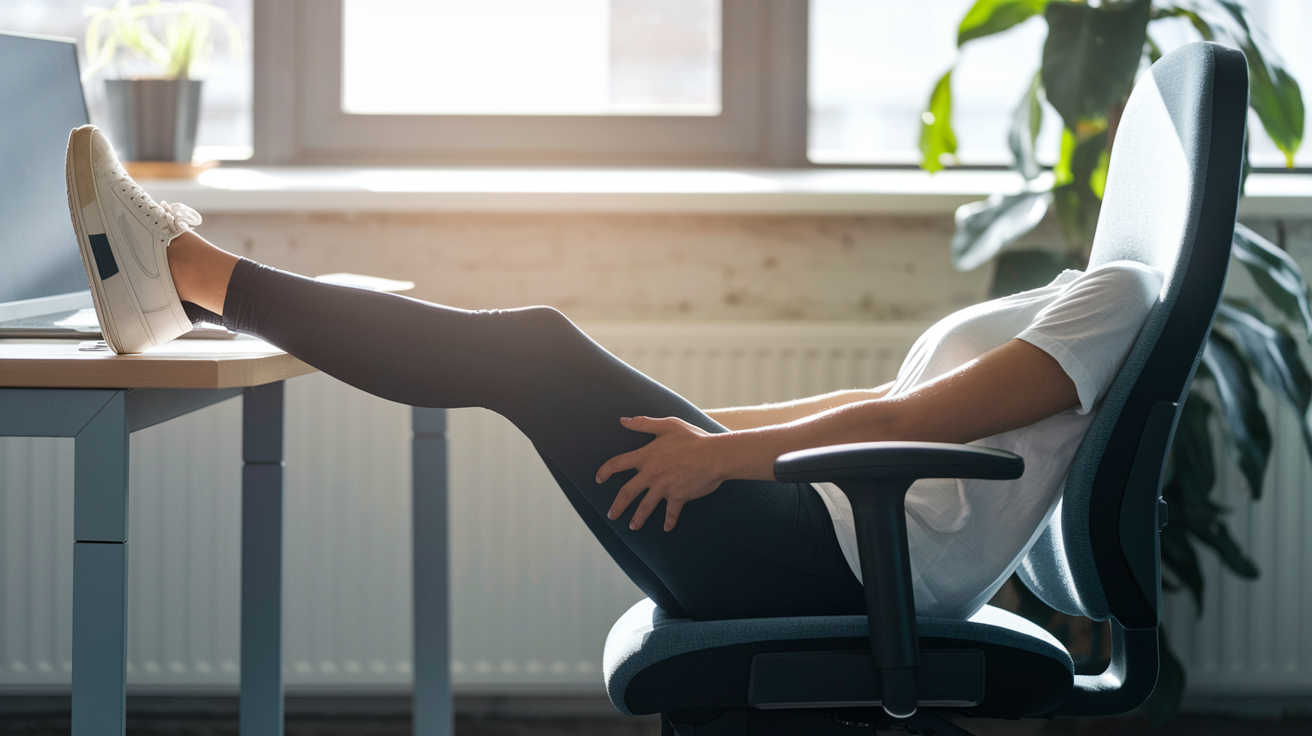
Glute Squeezes: 10 to 20 reps, holding each contraction for 3 to 5 seconds. Activates glutes discreetly to reduce low back load and maintain pelvic stability while seated.
Seated Neck and Shoulder Recovery Movements for Office Tension

Neck and shoulder tension build faster than you’d think when a screen sits too low or too far forward. Forward head posture stretches posterior neck muscles and compresses cervical joints, creating a cycle of tightness that worsens throughout the day. Simple upper body recovery movements reset that tension before it turns into a headache or referral pain down the upper back.
Shoulder rolls are one of the easiest moves for office environments. Do 10 forward circles followed by 10 backward circles, moving slowly enough to feel the muscle engagement at each point in the rotation. Really emphasize the upward shrug at the top and the downward release at the bottom to fully engage the trapezius and levator scapulae.
Chin Tucks: Sit tall with your back against the chair. Draw your chin straight back as if making a double chin, activating the deep neck flexors. Hold the end position for 2 seconds, then return to neutral. Complete 8 to 12 controlled reps. This counters forward head drift and restores cervical alignment.
Lateral Neck Flexion: Tilt your head sideways, bringing your ear toward your shoulder without lifting the shoulder or rotating your chin. Hold for 15 to 20 seconds per side, breathing steadily. Repeat 2 to 3 times. This releases tension along the side of your neck and upper trapezius.
Scapular Squeezes: Sit upright with arms relaxed at your sides. Pinch your shoulder blades together as if holding a pencil between them. Hold for 2 to 3 seconds, then release. Complete 10 to 15 reps. This improves scapular retraction and counteracts the rounded shoulder position common in desk work.
Shoulder Shrugs With Hold: Lift both shoulders straight up toward your ears, hold for 2 to 3 seconds at the top, then drop them completely. Do 10 reps. The brief hold at the peak releases accumulated tension in the upper trapezius and improves shoulder mobility.
Seated Spine, Mid-Back, and Low‑Back Mobility Routines for Desk Workers

Spinal mobility tanks quickly in a static seated position. Thoracic and lumbar segments stiffen when held in flexion for hours, reducing the natural curves that distribute load evenly across the vertebrae. Seated spine routines restore segmental motion, rehydrate intervertebral discs through movement, and reduce the compressive load that triggers low back discomfort.
Seated Cat–Cow for Spinal Rehydration
Sit forward on your chair with feet flat and knees at 90 degrees. Place your hands on your thighs for support. On the inhale, arch your chest forward and lift your gaze slightly, creating extension through the thoracic and lumbar spine. On the exhale, round your upper back and tuck your chin toward your chest, drawing your navel toward your spine. Move smoothly between these two positions for 6 to 10 breath cycles. The rhythmic flexion and extension pump fluid into spinal discs and release tension through the erector spinae and core.
Thoracic Rotation for Desk Stiffness
Sit tall with feet flat and core gently braced. Cross your arms over your chest, placing each hand on the opposite shoulder. Keeping your hips square and facing forward, rotate your upper body to one side as far as comfortable, pause for 1 second, then return to center and rotate to the other side. Do 8 to 12 controlled reps per side. This targets the thoracic spine and intercostal muscles, improving rotational mobility that sitting eliminates.
Seated Spinal Twist and Low-Back Opening
Sit sideways on your chair or rotate your torso while staying centered. Place one hand on the opposite knee and the other hand on the back of the chair for leverage. Gently twist your torso toward the backrest, keeping your hips stable and your spine tall. Hold the end range for 15 to 30 seconds, breathing deeply into the twist. Return to neutral and repeat on the other side. Don’t force the twist or use momentum. This opens the lumbar spine, releases tension in the obliques and paraspinals, and counteracts the forward flexed posture of desk work.
Hip, Glute, and Hamstring Relief Exercises Without Leaving Your Chair
Hip flexors shorten and glutes weaken when you sit for extended periods. That imbalance pulls the pelvis into anterior tilt, compresses the lumbar spine, and refers tension into the low back and outer hips. Seated hip and hamstring moves restore length to shortened tissues and reactivate glutes that have been inactive all morning.
Tight hips and hamstrings are common culprits behind low back discomfort in desk workers. Hamstrings attach to the pelvis, so when they tighten they pull the pelvis into posterior tilt and flatten the lumbar curve. Glute activation counters that pull and stabilizes the pelvis, reducing the compressive load on spinal segments.
Seated Figure-4 Stretch: Sit upright and place one ankle on the opposite knee, forming a “4” shape with your legs. Keep your back straight and lean forward gently from the hips until you feel a stretch in the glute and outer hip of the raised leg. Hold for 20 to 30 seconds per side, breathing steadily. Repeat for 2 to 3 rounds if time allows.
Chair-Edge Hamstring Stretch: Sit near the front edge of your chair. Extend one leg forward with the heel on the floor and toes pointing up. Keep the other foot flat. Hinge forward at the hips, maintaining a straight back and neutral spine, until you feel a stretch along the back of the extended leg. Hold for 20 to 30 seconds, then switch legs. Do 3 sets per side.
Glute Squeezes: Sit tall with feet flat. Contract both glutes as if trying to lift yourself slightly off the chair without actually moving. Hold the squeeze for 3 to 5 seconds, then release completely. Do 10 to 20 reps. This discreet activation drill reinforces glute engagement and reduces low back strain.
Seated Knee-to-Opposite-Shoulder Stretch: Sit upright and cross one ankle over the opposite thigh. Use both hands to gently pull the raised knee toward the opposite shoulder, keeping your back straight. Hold for 20 to 30 seconds per side. Repeat for 3 rounds. This targets the piriformis and deep hip rotators, releasing referral tension into the low back and hips.
Circulation and Lower-Leg Desk Exercises to Reduce Swelling and Fatigue

Lower leg circulation slows dramatically during prolonged sitting. Blood pools in the calves and ankles, increasing the risk of venous insufficiency and contributing to the heavy, swollen feeling at the end of a long workday. Simple ankle and calf movements restore venous return, reduce swelling, and improve alertness without requiring you to stand or leave your desk.
| Exercise | Duration / Reps | Benefit |
|---|---|---|
| Ankle Pumps | 20–30 seconds continuous | Reduces venous pooling, improves circulation, lowers DVT risk |
| Calf Raises (seated or standing) | 10–20 repetitions | Activates calf pump, improves circulation, stretches Achilles tendon |
| Seated Marches | 20–60 seconds alternating | Increases blood flow, activates hip flexors and core, boosts alertness |
| Heel and Toe Taps | 20–30 seconds alternating | Mobilizes ankle joint, reduces stiffness, improves lower-leg circulation |
Do ankle pumps by flexing and pointing your feet in a continuous rhythm, as if pressing an imaginary gas pedal. Keep the motion smooth and controlled. For calf raises, press through the balls of your feet to lift your heels off the floor, hold briefly at the top, then lower with control. Seated marches involve lifting one knee at a time while keeping your core braced and your back straight. Alternate legs in a steady rhythm for the prescribed duration.
Wrist, Hand, and Forearm Recovery Movements for Typing Relief

Repetitive typing and mouse use create chronic tension in the wrist flexors and extensors. Over time, that tension progresses into carpal tunnel symptoms, tendonitis, or generalized forearm fatigue. Wrist and hand recovery moves release accumulated tension, improve tendon gliding, and restore pain free range of motion.
Wrist flexor and extensor stretches are the foundation of hand recovery. For the flexor stretch, extend one arm forward with the palm facing up. Use the opposite hand to gently pull the fingers back toward your body until you feel a stretch along the underside of the forearm. Hold for 15 to 30 seconds per side, repeat for 2 to 3 rounds. For the extensor stretch, extend the arm with the palm facing down and use the opposite hand to press the fingers toward the floor, stretching the top of the forearm.
Tendon Glides: Start with your fingers extended and together. Slowly curl your fingers into a hook position, then into a full fist, then extend them again. Move through the sequence slowly and deliberately for 6 to 10 reps. This improves tendon gliding through the carpal tunnel and reduces stiffness.
Finger Spreads: Extend your fingers wide apart, hold for 2 to 3 seconds, then bring them back together. Repeat for 6 to 10 cycles. This simple movement releases tension in the intrinsic hand muscles and improves finger mobility.
Wrist Circles: Extend one arm forward and make slow, controlled circles with your wrist, moving in both directions. Do 6 to 8 circles clockwise, then 6 to 8 counterclockwise. This restores wrist mobility in all planes and reduces joint stiffness.
Guided Breathing and Relaxation Breaks to Pair With Seated Recovery

Physical tension and mental stress feed each other during a long workday. Breathing exercises activate the parasympathetic nervous system, lower heart rate and blood pressure, and create a physiological state that makes mobility work more effective. Pairing recovery moves with intentional breathing produces better results than movement alone.
Diaphragmatic breathing is the simplest and most effective desk friendly relaxation technique. Sit tall with feet flat and one hand on your lower abdomen. Inhale slowly through your nose for 4 to 6 seconds, allowing your belly to rise as your diaphragm descends. Exhale through your mouth for 4 to 6 seconds, feeling your abdomen fall. Repeat for 5 to 10 breath cycles. This pattern reduces sympathetic nervous system activity and increases focus and calm.
Box Breathing for Acute Stress: Inhale for 4 counts, hold for 4 counts, exhale for 4 counts, hold for 4 counts. Repeat this 4-4-4-4 cycle for 2 to 3 rounds. Box breathing is particularly effective before or after high stress meetings or during moments of acute tension. It resets your nervous system quickly and improves decision making under pressure.
Breath-Coordinated Movement: Pair your inhales and exhales with specific movements to amplify recovery effects. For example, inhale as you arch into the extension phase of seated cat-cow, and exhale as you round into flexion. This coordination deepens spinal mobility and the relaxation response.
Progressive Muscle Relaxation at Desk: Starting at your feet, tense one muscle group for 3 to 5 seconds, then release completely. Move upward through calves, thighs, glutes, core, chest, shoulders, arms, and face. This technique reduces chronic muscle holding patterns and pairs well with breathing exercises for a full body reset in under 5 minutes.
One‑Minute and Five‑Minute Seated Recovery Routines for Busy Professionals

Time scarcity is the most common barrier to consistent recovery work. Pre-built routines eliminate decision fatigue and make it easier to fit movement into a packed schedule. A one minute sequence can reset your posture and circulation between tasks. A five minute circuit provides deeper relief and measurable mobility improvement.
One‑Minute Microbreak Sequence
Start with 15 seconds of ankle pumps to restore lower leg circulation. Move immediately into 15 seconds of shoulder rolls, 10 forward and 10 backward. Finish with 30 seconds of seated cat-cow, coordinating each breath cycle with the movement. This sequence targets the three most common desk tension zones in under 60 seconds and can be repeated every hour without disrupting workflow. Microbreaks like this prevent tension from accumulating rather than trying to reverse it at the end of the day.
Five‑Minute Post‑Meeting Reset
Begin with 30 seconds of neck mobility work, doing slow head turns and lateral flexion holds. Move into 30 seconds of shoulder rolls. Then do 60 seconds of seated cat-cow, prioritizing smooth, controlled movement through the full range of spinal flexion and extension. Spend 30 seconds on each side in the seated figure-4 stretch, holding the stretch and breathing deeply into the hip. Follow with 30 to 60 seconds of ankle pumps and calf raises to restore lower body circulation. Finish with 30 seconds of diaphragmatic breathing to reset your nervous system before the next task. This routine addresses neck, shoulders, spine, hips, and circulation in a single efficient sequence.
Ergonomic Adjustments That Enhance Seated Recovery Exercises

Recovery moves and ergonomic alignment work together. Poor workstation setup places joints in compromised positions that undermine the benefits of mobility work. Correct ergonomics reduces baseline tension, allowing recovery exercises to produce faster and more lasting results.
Monitor height and distance are foundational. Position the top of your screen at eye level and 20 to 28 inches from your eyes. This distance reduces eye strain and prevents forward head posture. If your monitor sits too low, use a stand or stack of books to raise it. Elbow position matters for wrist and shoulder health. Keep your elbows at 90 to 110 degrees while typing, with wrists in a neutral position rather than extended or flexed. Adjust your chair height or use a keyboard tray to achieve this alignment.
Foot and hip position stabilize your lower body and reduce low back strain. Keep both feet flat on the floor with knees at approximately 90 degrees. If your feet don’t reach the floor, use a footrest. Your hips should sit slightly higher than your knees to maintain a neutral lumbar curve. Add lumbar support by using a chair with built-in support or by rolling a jacket, sweatshirt, or small towel and placing it behind your lower back.
Top priority: Monitor at eye level, 20–28 inches away. Second priority: Elbows at 90–110 degrees, wrists neutral. Third priority: Feet flat, knees at 90 degrees, lumbar support in place.
When to Modify Desk Exercises or Seek Professional Help

Not all discomfort responds to self-directed recovery work. Sharp pain, numbness, or symptoms that worsen with movement are red flags that require professional evaluation. Seated exercises are designed for general tension relief and mobility maintenance, not for diagnosing or treating acute injuries or chronic conditions.
Stop any movement immediately if you experience sharp pain, shooting sensations, numbness, tingling, or loss of strength. These symptoms suggest nerve involvement or structural issues that require assessment by a healthcare provider. Avoid loaded twisting, aggressive spinal flexion, or deep rotational stretches if you have a history of disc herniation, spinal surgery, or diagnosed spinal pathology. Gentle, controlled movements are safe for most people, but aggressive stretching can aggravate underlying conditions.
Sharp or radiating pain during or after a movement: This may indicate nerve compression, joint irritation, or soft tissue injury that requires imaging or hands-on evaluation.
Numbness, tingling, or weakness in the hands, arms, legs, or feet: These neurological symptoms suggest possible nerve entrapment or spinal involvement and should be evaluated promptly.
Pain that persists or worsens despite consistent use of recovery exercises and ergonomic adjustments: If symptoms don’t improve within 2 to 3 weeks of regular desk recovery work, schedule an in-person evaluation to determine appropriate treatment and rule out structural issues.
Final Words
Start with a quick move. Do a 20 to 60 second microbreak: chin tucks, shoulder rolls, seated cat–cow, ankle pumps, glute squeezes. These reduce stiffness fast.
This guide gave simple reps and holds, upper- and lower‑body options, circulation and hand drills, breathing resets, one- and five‑minute circuits, ergonomic tweaks, and safety cues.
Pick one short routine to repeat each work hour, even one minute helps. Make these seated recovery exercises to do at work part of your day, and you’ll feel less stiff and more energized.
FAQ
Q: What is the 3-3-3 rule for workout?
A: The 3-3-3 rule for workout usually means three of three—commonly three sets of three reps, or three exercises for three minutes each. Meanings vary, so follow the specific program’s definition.
Q: What is the 5 5 5 30 rule?
A: The 5 5 5 30 rule means taking about five minutes of movement every 30 minutes—often split into short walks, standing, or mobility. A 2023 trial found 5 minutes walking every 30 minutes offsets sitting harms.
Q: What exercise can I do while sitting at work? Do seated exercises really work?
A: Seated exercises you can do at work include chin tucks, shoulder rolls, seated cat–cow, ankle pumps, and glute squeezes, and they do work—short microbreaks reduce stiffness, improve circulation, and ease tension.
