

What if your stuck overhead press isn’t a strength problem but a mobility one? Daily habits like desk work, cycling, and training volume shove your shoulders forward, tighten your chest, and lock your upper back so overhead work becomes awkward or painful. This short routine fixes those root restrictions. In about 10 minutes you’ll move through five simple drills that open the shoulders, free the thoracic spine, and improve posture so presses and pulls feel smoother. No equipment needed. Do it before lifts, after training, or on rest days.
A Complete Shoulder Mobility Sequence for Better Posture and Stronger Overhead Lifts

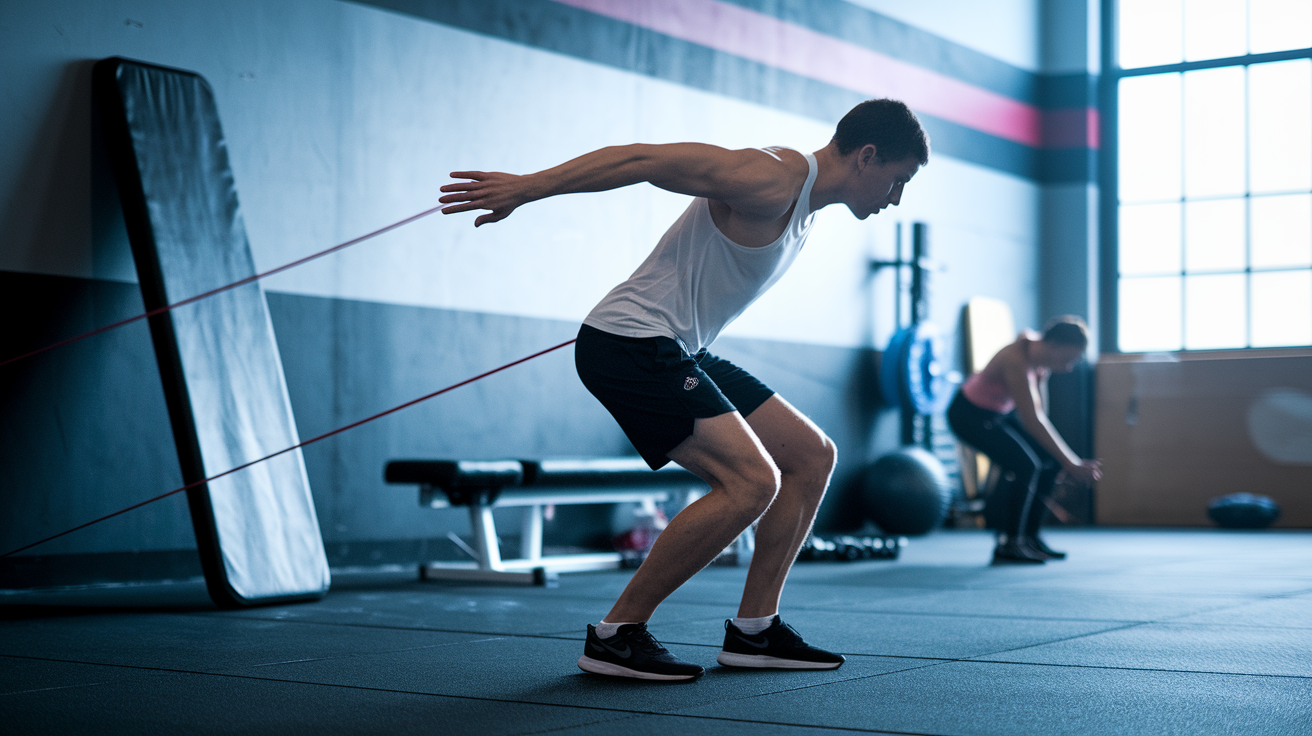
Cycling, desk work, and training volume all push your shoulders into the same pattern. Rolled forward, chest tight, upper back locked down. That position makes overhead pressing harder, limits how much power you can generate on a pull, and eventually creates a dull ache across the base of your neck. When your shoulders can’t move through their full range without compensation, something else takes over. Usually your lower back, your neck, or your elbows.
This 10-minute mobility sequence addresses the root restrictions that prevent clean overhead mechanics and upright posture. The routine targets your shoulders, chest, upper back, and thoracic spine with five movements you can do anywhere. Zero equipment required. It’s designed to fit into small pockets of time, like while your coffee brews or right before you start your session.
The session works for daily use or at least several times per week. Use it as a warm-up before pressing or pulling work, a cool-down after training, or a standalone maintenance drill on rest days. The structure is simple. Move through all five exercises in order, rest as needed, and repeat the circuit if time allows. Most people complete one full round in about 10 minutes.
The 5 exercises in order:
- Sweeping Overhead Reach, 12 to 15 reps
- Alternating Palms Facing Up, 10 to 15 reps per side
- Wall Angles, 8 to 12 reps
- Elbow Touches, 10 to 15 reps
- Alternating Hand Touches Behind Back, 8 to 12 reps per side
Use this sequence before overhead pressing, strict pull-ups, or Olympic lifts to prepare your shoulders for loaded range. Use it after your session or on off days to undo the tension that builds from training and sitting. The drills are gentle enough to do every day, and the time requirement is low enough that skipping becomes harder to justify.
Key Mobility Concepts That Influence Posture and Overhead Strength

Overhead strength starts at the thoracic spine, not the shoulder joint. If your mid-back can’t extend, your shoulder has to compensate by tilting forward or your lower back has to hyperextend to get your arm vertical. Tight pectorals pull your shoulders forward and limit external rotation. Stiff lats restrict how high your arm can travel overhead. Weak scapular stabilizers let the shoulder blade slide out of position under load, which creates pinching and reduces how much force you can produce.
Most of the restrictions that limit overhead performance live in the soft tissue around the shoulder girdle and the joints of the upper back. When those areas are stuck, your body finds another way to complete the movement. That workaround might look fine on the surface, but it loads structures that weren’t designed to handle the demand. Over time, that compensation shows up as neck tension, elbow pain, or a press that stops improving no matter how hard you push.
Good overhead mechanics require:
Thoracic extension that lets the ribcage stay stacked without arching the lower back. Scapular upward rotation so the shoulder blade moves with the arm instead of staying fixed. External rotation mobility so the humerus can clear the acromion without pinching. Lat and pec length that allows the arm to travel overhead without pulling the ribcage forward. Core stability to anchor the movement and prevent compensatory motion at the spine.
When these five elements work together, pressing feels smoother, pulling feels stronger, and overhead positioning stops demanding so much from your neck and lower back. Mobility work doesn’t replace strength training. It clears the path so that strength training can do what it’s supposed to do.
Step by Step Breakdown of the Core Mobility Drills for Shoulder Function

Each of the five drills in this sequence targets a specific restriction that shows up in overhead lifting and upright posture. The instructions below focus on what the movement should feel like, where to direct your attention, and how to stay in control from start to finish.
Sweeping Overhead Reach
This drill opens your shoulders, chest, and upper back while engaging the core to prevent compensatory arching. It’s an active stretch that primes the nervous system for overhead work and reinforces the connection between rib position and shoulder movement.
Stand with your feet shoulder width apart or kneel on both knees if balance is an issue. Pull your ribcage down slightly and keep your shoulders away from your ears. Extend both arms out to the sides at shoulder height, then sweep them overhead in a wide arc. As your hands meet above your head, bend both elbows so one hand drops in front of your forehead and the other lowers behind your head. Alternate which hand goes forward and which goes back on each rep. Inhale as your arms rise, exhale as they lower. Keep the movement smooth and resist the urge to shrug or arch your back to reach higher.
Alternating Palms Facing Up
This rotation drill loosens the shoulder joint, promotes circulation through the capsule, and prepares the rotator cuff for work under load. It’s one of the simplest movements in the sequence, but it addresses a range of motion that most people never train.
Stand or sit tall with your arms extended out to the sides at shoulder height, palms facing down. Rotate one palm to face up while keeping the other palm down, then reverse the position. The rotation should come from the shoulder, not the wrist or elbow. Move slowly and deliberately, inhaling as one palm rotates up and exhaling as you switch. Keep your shoulders down and don’t let your elbows drift forward or back. If you feel pinching, widen your arms slightly or reduce the range until the movement is smooth.
Wall Angles
Wall angles improve scapular control, thoracic positioning, and overhead range while giving you real-time feedback on whether you’re compensating. This drill is harder than it looks. Most people can’t complete a full rep without their lower back peeling off the wall.
Stand with your back flat against a wall, feet a few inches away, and press your lower back into the surface. Raise your arms into a goalpost position with elbows bent at 90 degrees, upper arms parallel to the floor. Try to keep your forearms, elbows, upper back, and the backs of your hands in contact with the wall. Slowly slide your arms upward as if you’re reaching overhead, maintaining contact the entire time. Inhale as your arms rise, exhale as they return to the starting position. If your back arches or your hands leave the wall, reduce the range and work within the space you can control. Over time, the range will increase as your thoracic spine and scapular control improve.
Elbow Touches
This movement opens your chest and mobilizes the upper back through a dynamic range that mimics the closing and opening phase of many pulling and pressing patterns. It’s particularly useful for people who spend time in a forward-leaning position.
Interlace your hands behind your head with your elbows pointed out to the sides. Bring both elbows forward until they touch in front of your chest, feeling a stretch across your upper back and the backs of your shoulders. Then pull your elbows wide in a sweeping arc to open your chest. Inhale as you open, exhale as you close. Keep your neck neutral. Don’t jut your chin forward or hunch your upper back to force the range. Move slowly and focus on the stretch through the chest and the engagement across the upper back.
Alternating Hand Touches Behind Back
This drill challenges shoulder internal and external rotation while training coordination between the two arms. It stretches the front and back of the shoulder in ways that most people rarely access outside of this specific pattern.
Stand or sit tall and hold a water bottle in one hand, or perform the movement without a prop if you’re just starting. Reach one arm over your shoulder to place your hand on your upper back, and reach the other arm behind your lower back. If you’re using a water bottle, pass it from the lower hand to the upper hand, then switch sides and pass it back. If you’re not using a prop, simply try to bring your hands as close together as possible. Alternate sides each rep, moving slowly. Don’t jerk or force it. If your hands don’t meet, that’s the starting point. Consistent practice will close the gap.
Additional Mobility Tools and Variations to Improve Overhead Capacity

The bodyweight sequence above provides the foundation, but adding simple tools can deepen the work and target restrictions that need more focused attention. A PVC pipe, a resistance band, a doorway, and a foam roller are enough to address most of the common sticking points that limit overhead range and upright posture.
PVC dislocations stretch the anterior shoulder and train the scapula to upwardly rotate under control. Start with a wide grip, keep your arms straight, and pass the pipe from your hips to overhead and behind your back, then reverse the path. If you feel pinching or your elbows bend, widen your grip. Resistance bands add load to scapular retraction and external rotation, which strengthens the muscles that pull your shoulders back and stabilize the joint under tension. Doorway stretches isolate the pectorals, and foam rolling the thoracic spine restores extension that gets lost from sitting and training.
Tool based variations and cues:
PVC dislocations with a wide grip, 8 to 10 controlled reps, no forcing through painful range. Band pull-aparts at shoulder height, 10 to 15 reps, keeping ribs down and shoulders away from ears. External rotation with a band anchored at elbow height, 10 to 12 reps per side, upper arm fixed to your side. Doorway pec stretch with forearms on the frame, 20 to 30 seconds per side, step forward to increase tension. Foam roller thoracic extensions with hands behind head, 5 to 8 small rocks forward and back. Lat stretch on a bench or wall, reaching one arm overhead and leaning to the side, 20 to 30 seconds per side.
Add these variations after the core sequence when you have extra time, or use them on their own if you’re targeting a specific restriction. If your pecs are chronically tight, spend more time on the doorway stretch. If your scapular control is weak, prioritize band pull-aparts and wall slides. The tools don’t make the routine work, but they give you more options to address what’s limiting your movement.
Scapular Strength and Control for Long Term Posture Improvement
Mobility without control leads to instability under load. The scapula has to move with the humerus during overhead motion, and that movement depends on the strength and coordination of the serratus anterior, lower trapezius, and rotator cuff. When those muscles are weak or underactive, the shoulder compensates by shifting forward, which reduces space in the joint and creates pinching.
Scapular control drills train the shoulder blade to upwardly rotate, protract, and retract on command. Wall slides teach the scapula to glide smoothly while maintaining contact with the ribcage. Y-T-W drills performed prone on a bench or the floor activate the lower traps and posterior rotator cuff in positions that mimic overhead and horizontal pulling. Band pull-aparts reinforce retraction and external rotation, and high plank shoulder taps add an anti-rotation stability challenge that forces the scapula to stabilize under movement. Poor scapular control is one of the most common reasons pressing and pulling movements feel restricted, and addressing it often eliminates the shoulder pinching that many athletes assume is structural.
Key drills that improve scapular control:
Wall slides in a goalpost position, focusing on upward rotation and contact with the wall. Prone Y-T-W on a bench, 8 to 10 reps per position, thumbs up, light or no weight. Band pull-aparts for horizontal abduction and scapular retraction, 10 to 15 reps. High plank shoulder taps, alternating sides for 20 to 30 seconds, minimal hip shift. Serratus punches from a push-up position, protracting the scapula at the top of each rep.
Program these drills 3 to 5 times per week, either as part of your warm-up or between sets of pressing and pulling work. They don’t require much time or equipment, and the carryover to overhead strength and posture is immediate. Scapular stability is the bridge between mobility and strength. Without it, you’ll keep losing position under load no matter how much stretching you do.
Integrating Mobility Into Your Regular Training for Better Overhead Strength

Mobility work is most effective when it’s placed strategically around your training, not treated as a separate activity you do once in a while when your shoulders feel tight. Active drills that involve movement and muscle engagement belong in your warm-up. Slower stretches that target end-range positions belong after your session when your tissues are warm and your nervous system is calm.
A typical pre-training sequence might look like 2 to 3 minutes of light movement to raise your heart rate, followed by 5 to 8 minutes of shoulder-specific mobility drills that prepare the joints and muscles for the work ahead. After your session, spend another 5 to 10 minutes on slower stretches and positional holds that reinforce the range you just trained. Frequency matters more than duration. Three 10-minute sessions per week will produce more consistent improvements than one 30-minute session on Sunday.
Warm-up integration steps:
Start with 2 to 3 minutes of light cardio or dynamic movement to raise tissue temperature. Perform 1 to 2 rounds of the core 5-exercise mobility sequence at a controlled tempo. Add band pull-aparts, external rotations, or scapular activation drills if pressing or pulling is the focus. Move directly into your first working set with lighter loads to confirm the range feels smooth. If any movement feels restricted or uncomfortable, return to the specific mobility drill that targets that range. Track how your warm-up routine affects your pressing numbers, overhead position, and joint comfort over time.
Progress shows up as less compensatory movement, smoother transitions through sticky points, and the ability to maintain position under heavier loads. If your shoulders stop rounding forward during a press, or your elbows stop flaring out during a pull-up, the mobility work is doing its job. Retest your overhead range every 2 to 3 weeks to confirm the improvements are sticking.
Quick Screening Tests and Progress Benchmarks for Shoulder Mobility

You can’t improve what you don’t measure, and shoulder mobility is easy to assess with a few simple tests that take less than two minutes. These screens show where your restrictions live, how your body compensates, and whether the work you’re doing is producing the changes you want.
Stand facing a wall with your toes touching the baseboard. Raise one arm overhead and try to touch the wall with your thumb without arching your back or bending your elbow. If you can’t reach the wall, or if your ribs flare forward to make contact, you’re compensating with lumbar extension instead of true shoulder flexion. Test both sides and note any asymmetry. Lie on your back with your knees bent and your lower back flat on the floor. Raise both arms overhead and try to touch the floor behind you with the backs of your hands. If your back arches or your ribs lift, your lats or pecs are restricting the movement. Retest weekly to track improvement.
| Test Name | What It Measures | Improvement Signs |
|---|---|---|
| Wall-facing overhead reach | Shoulder flexion without lumbar compensation | Thumb touches wall, ribs stay down, no back arch |
| Supine arm overhead floor touch | Lat and pec length, scapular upward rotation | Backs of hands touch floor, lower back stays flat |
| Side-to-side comparison during overhead press | Symmetry and scapular control under load | Both sides reach the same height with identical mechanics |
| Elbow-to-opposite-knee rotation test | Thoracic rotation and scapular mobility | Smooth rotation without shoulder hiking or rib flare |
Retest every 7 to 10 days, ideally at the same time of day and after a similar warm-up. Improvements are often subtle at first. You might notice that your ribs stay down a little longer during the overhead reach, or that the pinching you used to feel at the top of a press doesn’t show up as early in the set. Those small wins add up to cleaner mechanics and stronger lifts.
Daily Habits That Support Shoulder Mobility and Upright Posture

Mobility gains made during a 10-minute session can be undone by eight hours of forward-leaning posture at a desk or behind the wheel. Daily habits that reinforce upright positioning and shoulder health are just as important as the drills themselves.
Check your posture every time you sit down. Pull your shoulder blades back and down, stack your ribcage over your pelvis, and keep your screen at eye level so you’re not craning your neck forward. Set a timer to stand and move every 30 to 40 minutes. If you sleep on your side, don’t let your top shoulder roll forward by placing a pillow in front of your chest. These adjustments won’t fix restricted tissue on their own, but they prevent the restrictions from getting worse and give your mobility work a better chance to stick.
Daily habit checklist:
Perform 5 minutes of shoulder mobility first thing in the morning or before your session. Set a reminder to check and correct your posture every hour during desk work. Stand and perform 10 band pull-aparts or arm circles between long periods of sitting. Don’t sleep with your arm overhead or your shoulder rounded forward. Use a foam roller for 2 to 3 minutes on your upper back before bed if you sit most of the day. Pair every heavy pressing session with an equal volume of horizontal or vertical pulling to maintain balance.
Final Words
Start with the 10-minute sequence as your go-to warm-up or cool-down. It’s five core drills with clear rep ranges that target the shoulders, chest, upper back, and thoracic spine.
Add scapular control work, simple mobility tests, and tool variations when needed. Do the routine several times a week and pair it with light strength drills for lasting change.
This shoulder mobility routine to improve posture and overhead strength fits into busy days—5–10 minutes makes a real difference. Keep going; small, steady wins add up.
FAQ
Q: What is the purpose of this shoulder mobility sequence?
A: The shoulder mobility sequence is designed to improve posture and overhead strength by opening shoulders, chest, upper back, and thoracic spine, reducing pinching and making overhead lifts feel safer and smoother.
Q: How long is the routine and what are the reps?
A: The routine lasts about 10 minutes and includes five core exercises with rep ranges of 12–15, 10–15 per side, 8–12, 10–15, and 8–12 per side to build range and control.
Q: How often should I do the routine?
A: You should do the routine daily or several times per week; 10–15 minutes is enough to maintain mobility, prime shoulders before pressing, or help recovery as a cool-down.
Q: Can I use this sequence as a warm-up for overhead presses?
A: Yes — you can use this sequence as a pre-workout warm-up for presses to improve thoracic extension and scapular control, helping your overhead reach feel more stable and efficient.
Q: What mobility restrictions cause poor overhead posture and how does this routine help?
A: Tight pecs, lats, and a stiff thoracic spine cause rounded shoulders and poor overhead mechanics; this routine targets those areas to restore extension, shoulder mobility, and better movement patterns.
Q: What tools or variations can deepen my shoulder mobility work?
A: You can add a PVC or dowel (use a wide grip for dislocations), resistance bands, doorway pec stretches (20–30 seconds per side), and foam-roller thoracic drills for deeper range and tissue work.
Q: Which strength drills help lock in mobility gains?
A: Scapular-strength drills like serratus activation, wall slides, Y‑T‑W routines, band pull-aparts, and high-plank shoulder taps improve upward rotation and control; aim to train these 3–5 times per week.
Q: How do I integrate mobility into my regular training?
A: Integrate mobility by doing active drills pre-work (rotator cuff activation → scapular control → pressing), saving slower stretches for after training, and scheduling 10–15 minute mobility sessions 3–5 times weekly.
Q: How should I test shoulder mobility progress and how often?
A: Test with an overhead wall-facing reach, an arm-raise compensation check, and side-to-side comparisons; retest weekly and expect less arching, reduced pinching, and a smoother overhead path.
Q: When should I add extra tools or progressions to my routine?
A: Add tools or progressions when the basic routine stops improving your range or overhead comfort, or when you need more thoracic extension; keep consistency with the base work first.
