

Think you need an hour at the gym to get stronger? Think again.
This 20-minute beginner strength workout at home fits any schedule, needs little equipment, and trains your whole body safely.
It uses short intervals, simple movements, and a quick warm-up to build strength, improve posture, and boost everyday energy.
If you’ve been short on time or unsure where to start, this plan gives clear options like bodyweight or light dumbbells, and a step-by-step routine you can finish in 20 minutes and repeat three times.
Quick-Start 20-Minute Strength Routine You Can Do at Home
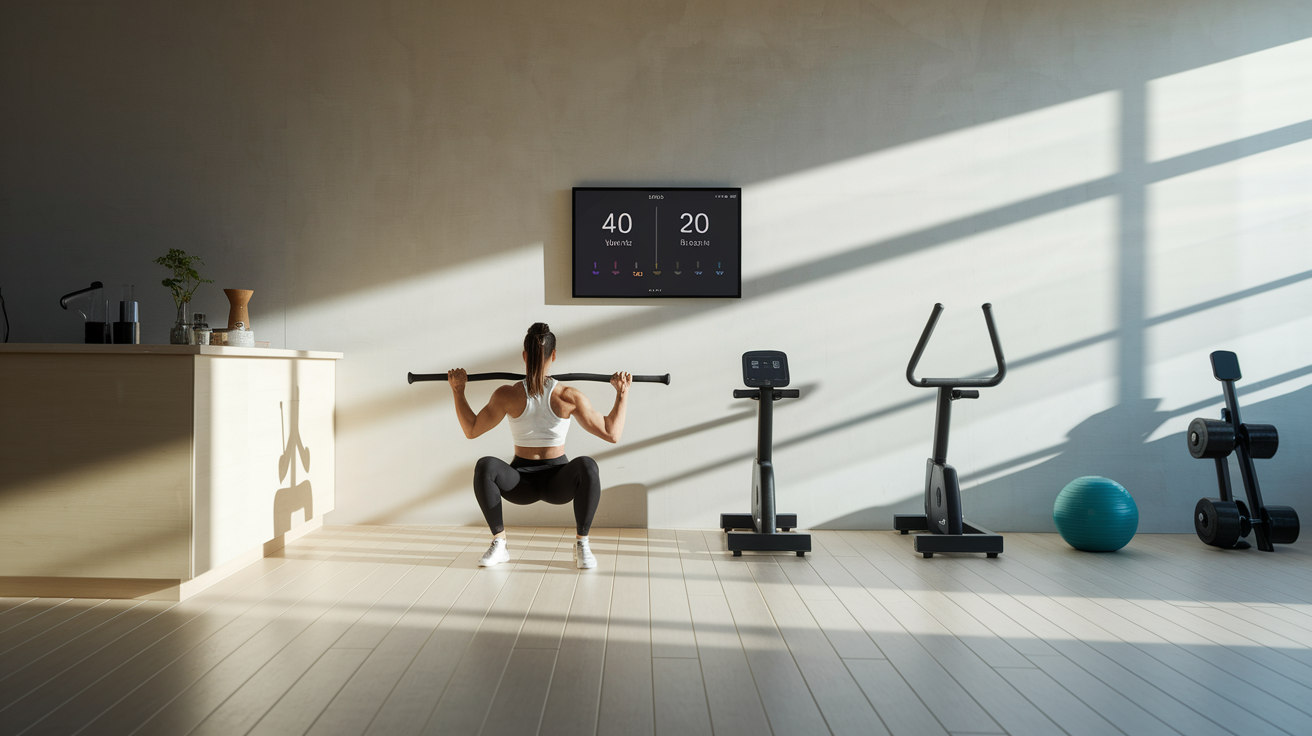
This 20-minute beginner strength workout fits into any schedule and needs barely any equipment. The whole thing’s built around timed intervals, simple movements, and a warm-up to cool-down structure that hits your entire body without repeating exercises. You can do it with just bodyweight, or grab one pair of light dumbbells (5 to 15 lb works to start) if you want more resistance. The format keeps you moving, builds foundational strength, and wraps up in exactly 20 minutes.
Here’s the complete circuit you can start today:
- Warm-Up (2 minutes): Squat + Overhead Reach and Hip Hinge + Rotation to prep your joints and wake up major muscle groups.
- Squat Variation (40 seconds work / 20 seconds rest): Bodyweight squat or holding light dumbbells at your sides.
- Push Pattern (40/20): Incline push-up from a chair or countertop, or kneeling push-up on a mat.
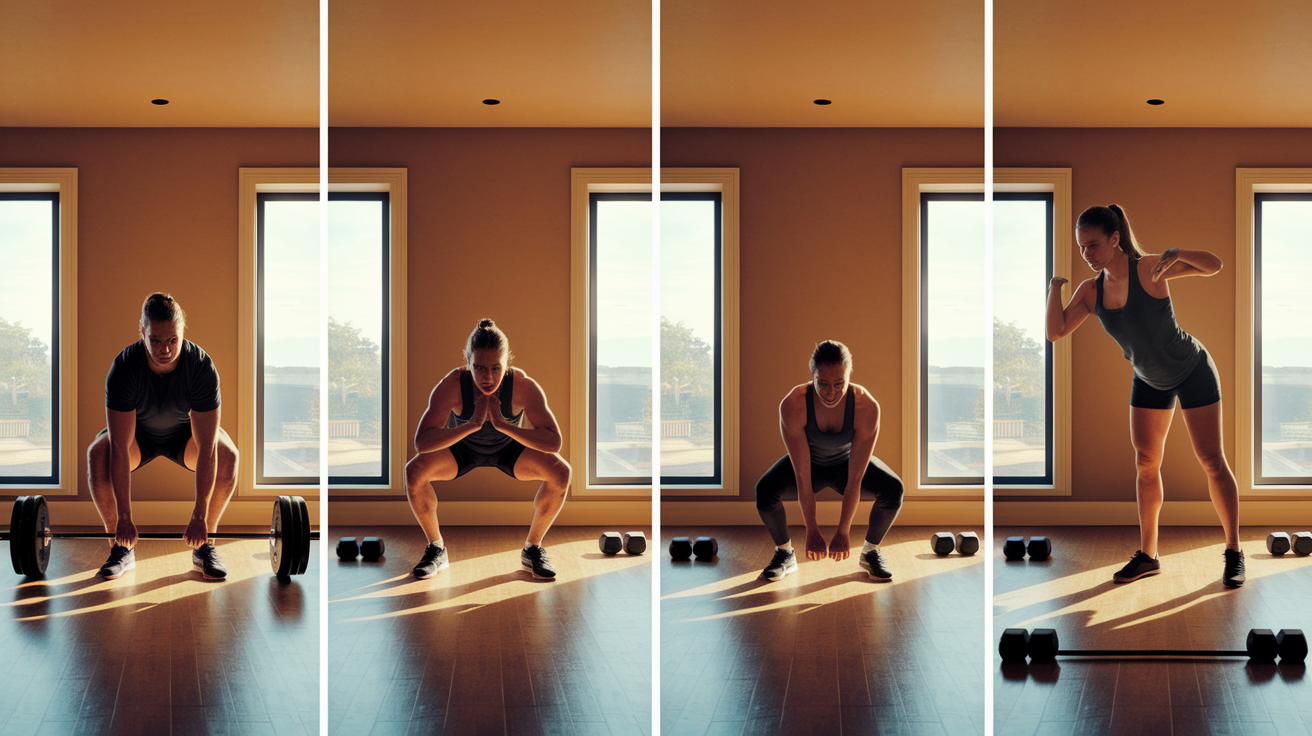
- Hinge Pattern (40/20): Hip hinge with bodyweight, or light dumbbell deadlift if you’ve got weights.
- Pull Pattern (40/20): Bent-over dumbbell row (if using weights), or bodyweight Superman holds on the floor.
- Core Hold (40/20): Low plank from your knees or toes, holding steady position.
- Optional Add-On: If you have dumbbells, swap any bodyweight move for a dumbbell variation (like adding shoulder press or bicep curls).
- Cool-Down (2 minutes): Toe Touch + Chest Opener and Standing Quad Stretch to release tension and support recovery.
To run this 20-minute bodyweight routine, set a timer for repeating 40-second work intervals with 20-second rest breaks. Move through all five main exercises, then repeat the full circuit two more times for a total of three rounds. Keep transitions quick, focus on controlled form over speed, and adjust intensity by slowing your tempo or reducing range if needed. Rest as required between rounds, but try to stay within the 20-minute window for the full effect.
Building a Beginner-Friendly Strength Circuit at Home
Full-body circuits let you train every major muscle group in a short window by pairing compound movements that hit multiple joints and muscle chains at once. This approach works especially well for home strength training because it builds coordination, burns energy, and creates a balanced stimulus without needing a long list of isolation exercises. A 20-minute session built this way delivers strength, endurance, and functional movement patterns that carry over into daily tasks like lifting groceries or climbing stairs.
Common compound patterns you can rotate into simple circuits include:
- Hinge + Press: Deadlift paired with overhead shoulder press to work posterior chain and shoulders in one sequence.
- Squat + Row: Wide squat followed by bent-over dumbbell row to target legs, glutes, and back.
- Lunge + Curl: Reverse lunge combined with bicep curl to challenge legs, hips, and arms simultaneously.
- Calf Raise + Triceps: Standing calf raise paired with overhead tricep extension to hit lower legs and upper arms.
- Side-to-Side Squat + Chest Press: Lateral squat movement followed by standing chest press to engage legs, core, and chest.
To keep the workout fresh, rotate these pairings weekly or swap in bodyweight alternatives when you don’t have equipment. You can also adjust difficulty by changing the order, adding a tempo challenge (like a slow 3-second lowering phase), or increasing the work interval from 40 to 45 seconds once the original format feels manageable. The goal is to move through each compound pattern with control, rest briefly, and repeat the circuit until the timer runs out.
Essential Warm-Up for a 20-Minute Strength Session

Warm-ups prepare your joints, activate dormant muscle groups, and rehearse the movement patterns you’re about to load during the main workout. Dynamic patterns like Squat + Overhead Reach open the hips, ankles, and shoulders while getting your heart rate up, which improves blood flow and reduces the risk of strains or compensations. Moves like Hip Hinge + Rotation prime the posterior chain and thoracic spine, two areas that often feel stiff after sitting or sleeping. These few minutes of intentional movement make the rest of the session smoother, safer, and more effective.
A solid warm-up for a 20-minute session includes:
- Mobility Focus: Take your joints through full ranges of motion (hip flexion, shoulder flexion, ankle dorsiflexion) without load, like during Squat + Overhead Reach.
- Activation Focus: Wake up stabilizers and postural muscles (glutes, core, mid-back) using controlled rotations and hinges, as in Hip Hinge + Rotation.
- Heart-Rate Elevation: Gradually increase circulation and core temperature with 10 to 15 reps of each warm-up move, performed at a steady, controlled pace.
- Movement Pattern Rehearsal: Practice the exact patterns you’ll load later (squat, hinge, press) to build coordination and muscle memory before adding resistance.
Aim for 2 to 4 minutes of warm-up depending on how stiff or cold you feel. If you’re training first thing in the morning or after a long day at a desk, lean toward 4 minutes and add extra hip circles or arm swings. If you’re already moving around and feel loose, 2 minutes is enough to prep your system and get started safely.
Beginner Strength Exercises to Include in a 20-Minute Home Workout
Form cues help you execute each movement with control and intention, which builds strength safely and reduces the risk of compensation patterns. Clear, simple cues direct your attention to the body parts that need to stabilize or move, like “drive through your heels” or “keep elbows tucked.” These reminders matter most when you’re learning compound exercises, because one unstable joint can shift the load away from the target muscles and increase injury risk.
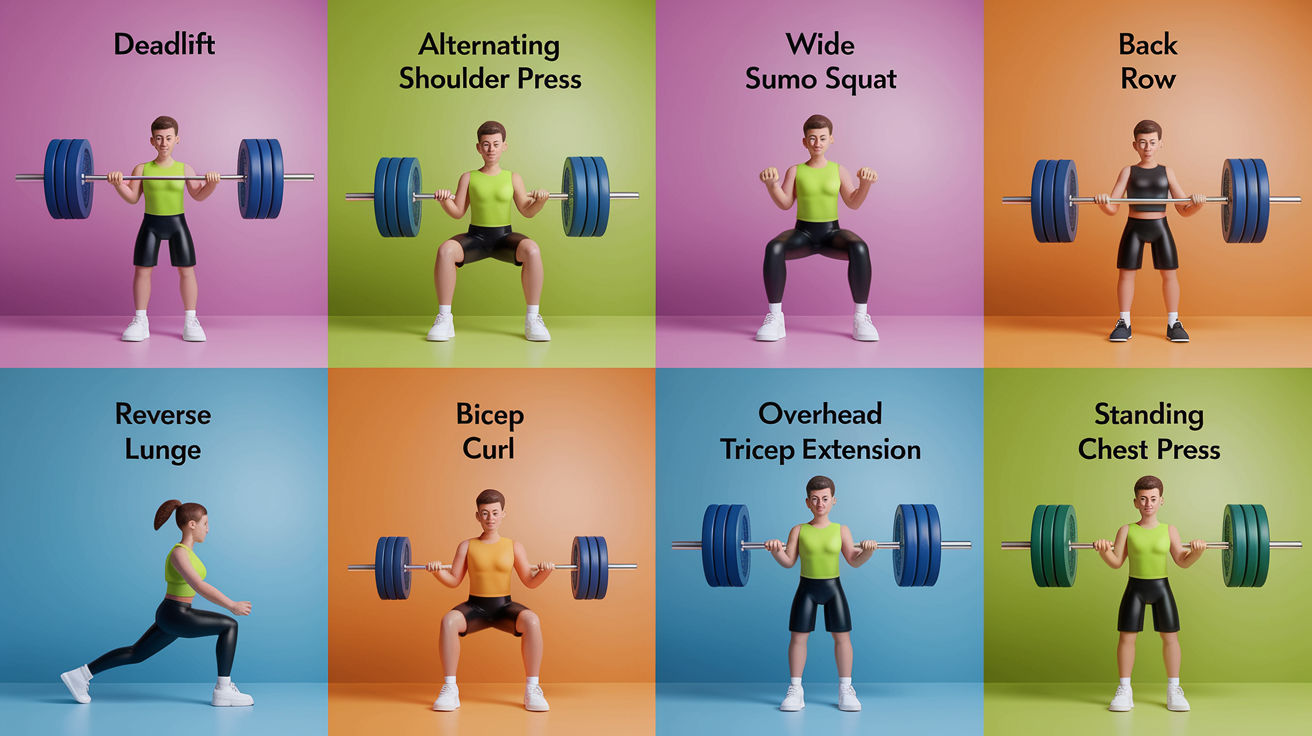
| Exercise | Main Muscles Targeted | Key Form Cue |
|---|---|---|
| Deadlift | Hamstrings, glutes, lower back, core | Hinge at hips with slight knee bend; drive through heels |
| Alternating Shoulder Press | Deltoids, triceps, upper back | Keep one arm racked while pressing the other overhead |
| Wide (Sumo) Squat | Quads, glutes, inner/outer thighs | Feet wider than hips, toes out; drop hips to knee level |
| Back Row | Lats, mid-back, rear delts | Hinge forward with flat back; row dumbbells toward hips |
| Reverse Lunge | Glutes, quads, hamstrings, core | Step back to 90° knees; keep torso upright |
| Bicep Curl | Biceps brachii | Palms up, curl to shoulder height, elbows tucked |
| Overhead Tricep Extension | Long head of triceps, shoulder stabilizers | Elbows close to ears; bend to 90° and press back up |
| Standing Chest Press | Pectorals, deltoids, core | Hold weight at chest; press with controlled rotation |
If a movement feels unstable or unclear, choose a simpler variation that lets you master the pattern first. For example, replace reverse lunges with split squats (both feet stay planted), swap floor push-ups for incline push-ups from a chair, or practice deadlifts with just bodyweight until the hinge pattern feels natural. Building confidence with supported positions prepares you to move forward safely when you’re ready.
Controlled tempo and stable positions matter more than adding reps or load. A slow 2 to 3-second lowering phase (eccentric) creates more muscle tension and teaches you how to resist gravity with control, which builds strength faster than rushing through high-rep sets with bouncy form. Stay present in each rep, breathe steadily, and prioritize quality over speed.
How to Modify a 20-Minute Beginner Strength Workout at Home for Different Abilities
Modifications support consistency and safety by meeting you where your body is today. Whether you’re managing joint discomfort, returning from time off, postpartum, or new to strength training, adjusting range, support, or intensity lets you participate without risking injury or burnout. Small changes to exercise selection or setup can make the difference between a session that feels doable and one that feels discouraging.
Six practical modification examples:
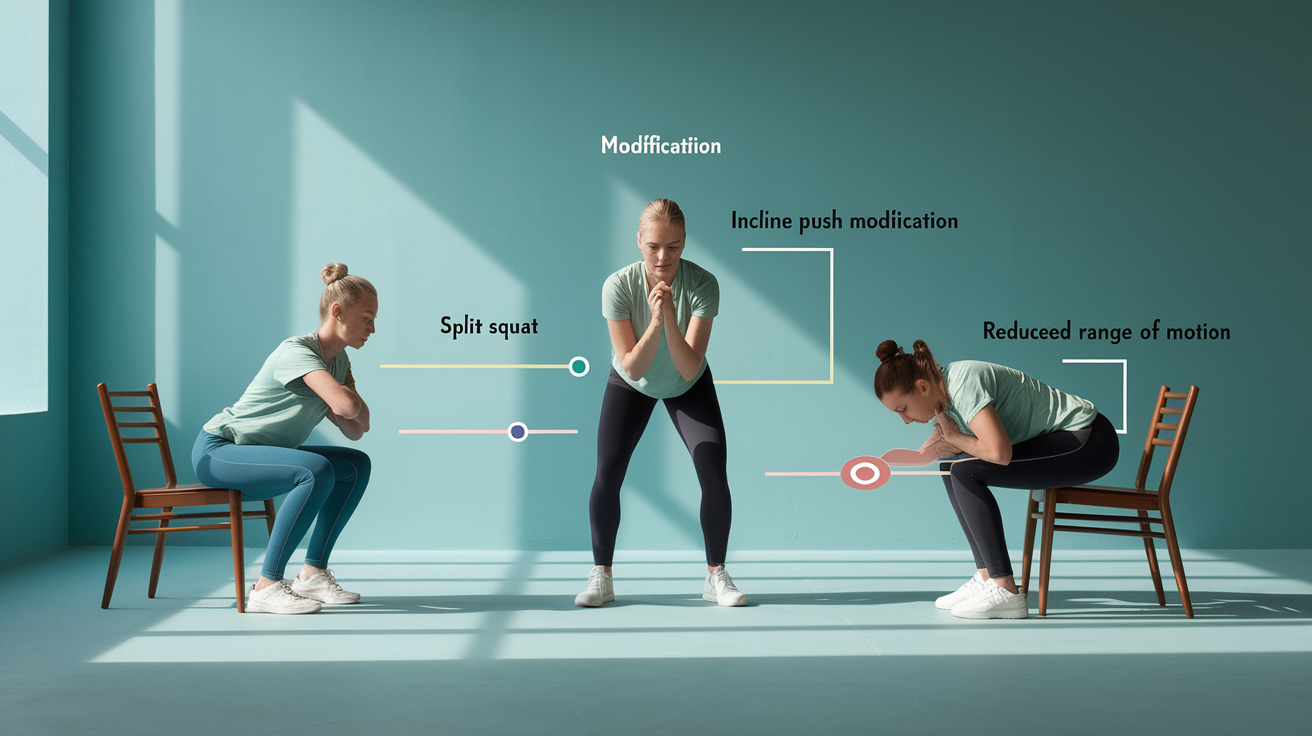
- Reverse Lunge to Split Squat or Split Lunge: If stepping back feels unstable or uncomfortable for your knees, keep both feet planted and lower into a stationary lunge position instead.
- Floor Push-Up to Incline Push-Up: Place your hands on a sturdy chair, countertop, or wall to reduce the load on your shoulders and wrists while building pressing strength.
- Chair-Assisted Squats: Hold the back of a chair for balance during squats, or sit back onto a chair at the bottom of each rep to control depth and build confidence.
- Reduced Range of Motion: If full-depth squats or lunges feel too intense, work within a shorter range (like quarter squats) until your mobility and strength improve.
- Slower Tempo: Cut your reps in half and perform each one with a 3-second lowering phase to increase time under tension without adding load.
- No-Weight Options: Swap all dumbbell exercises for bodyweight versions (like air squats, Superman holds, and bodyweight glute bridges) to learn the patterns first.
Reduce load or intensity if you notice sharp pain, dizziness, or form breakdown that you can’t correct with a cue. It’s better to finish a lighter session with solid movement quality than to push through and risk a strain or setback. Listen to your body, adjust as needed, and know that showing up consistently with good form beats chasing intensity on a tough day.
Choosing Equipment for a 20-Minute Home Strength Routine
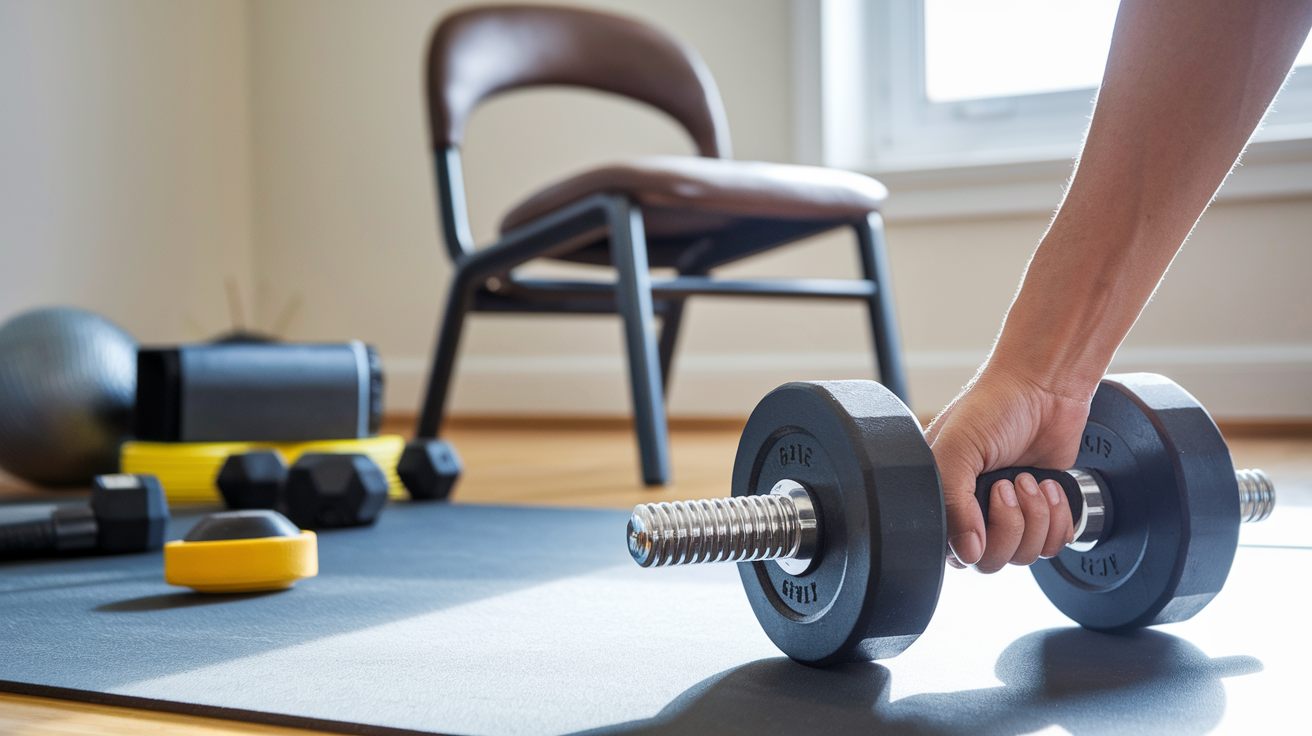
The minimum equipment for a full-body circuit is one pair of light dumbbells (5 to 15 lb to start) or no equipment at all if you’re using bodyweight. A yoga mat adds comfort for floor-based moves like planks or glute bridges, and a sturdy chair or box can serve as an incline surface for push-ups or a support point for balance during squats and lunges. That’s all you need to run an effective 20-minute session at home without a gym membership or heavy investment.
Four essential equipment options:
- Dumbbells: Start with a single pair between 5 and 15 lb. Adjustable dumbbells are a smart choice if you want to switch weights by exercise (lighter for shoulders, heavier for squats).
- Resistance Bands: Loop bands or therapy bands add variable resistance for rows, presses, and glute work. They’re portable, affordable, and easy on joints.
- Mat: A basic yoga or exercise mat protects your knees and elbows during floor exercises and provides grip on hard surfaces.
- Chair or Box: Any stable chair or step can be used for incline push-ups, step-ups, or seated support during balance-challenging moves.
Recommended starter dumbbell weights fall between 5 and 25 lb, depending on your current strength. Most beginners can handle 8 to 12 lb for upper-body pressing and rowing moves, and 12 to 20 lb for lower-body exercises like squats and deadlifts. If you’re unsure, start lighter than you think you need and focus on completing all reps with control. You can always increase the load once the movement feels smooth and stable.
When choosing load, prioritize safety over ego. If you can’t maintain neutral spine, steady breathing, or full range of motion, the weight is too heavy. Drop down one size, slow your tempo, or reduce your reps until your form is solid. Lifting lighter with perfect technique builds strength faster and safer than grinding through heavy reps with compensation patterns.
Sets, Reps, and Timing for a 20-Minute Beginner Strength Workout at Home
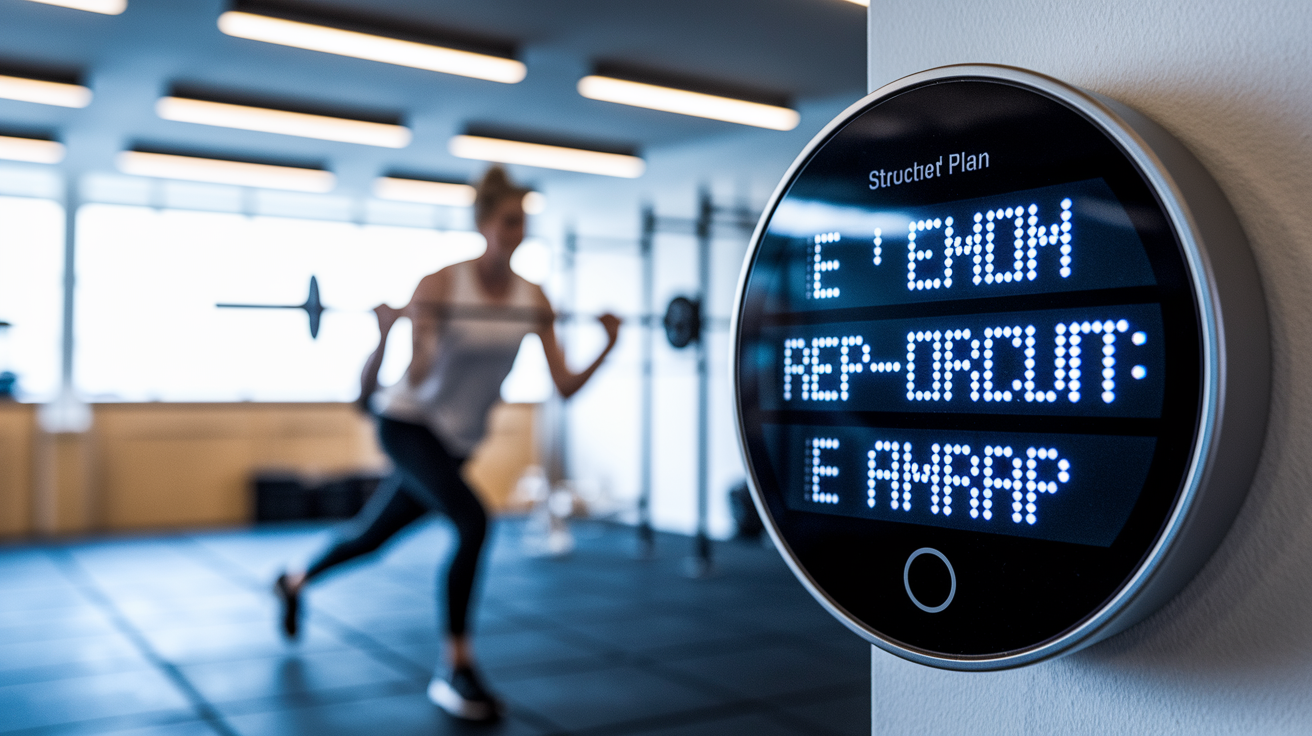
Interval-based formats use timed work periods (like 40 seconds on, 20 seconds off) and let you move at your own pace, focusing on quality reps rather than hitting a specific number. This structure feels more forgiving because you can slow down when you need to without feeling behind. Rep-based formats assign a fixed rep count (like 10 reps per exercise) and allow variable rest, which gives you more control over pacing but requires discipline to keep rest periods short enough to finish in 20 minutes. Both work well for short home sessions, and the choice comes down to personal preference and energy levels.
Three alternative timing options to explore:
- EMOM (Every Minute on the Minute): Start a new exercise at the top of each minute. Complete your assigned reps (like 8 to 10), then rest for whatever time remains until the next minute starts. Repeat for 15 to 20 minutes.
- Rep-Circuit with Fixed Rest: Perform 10 to 12 reps of each exercise, rest for 30 seconds, then move to the next exercise. Complete 3 rounds of 5 exercises for a total of 15 working sets.
- AMRAP (As Many Rounds As Possible): Set a 15 or 18-minute timer and cycle through your 5-exercise circuit as many times as you can with good form, resting only as needed between exercises.
Rate of Perceived Exertion (RPE) helps you gauge intensity without a heart rate monitor or advanced training knowledge. On a scale of 1 to 10, aim for a 6 or 7 during work intervals, which feels like “challenging but sustainable.” You should be able to talk in short sentences, and your form should stay stable through the final few reps.
Additional rest is helpful when you notice your heart rate spiking above conversational pace, your form starting to break down, or your breathing becoming rapid and shallow. Take 10 to 15 extra seconds, reset your posture, and continue when you’re ready. Pushing through fatigue with sloppy form teaches bad movement patterns and increases injury risk, so rest when your body asks for it.
Progressive Overload for 20-Minute At-Home Strength Gains
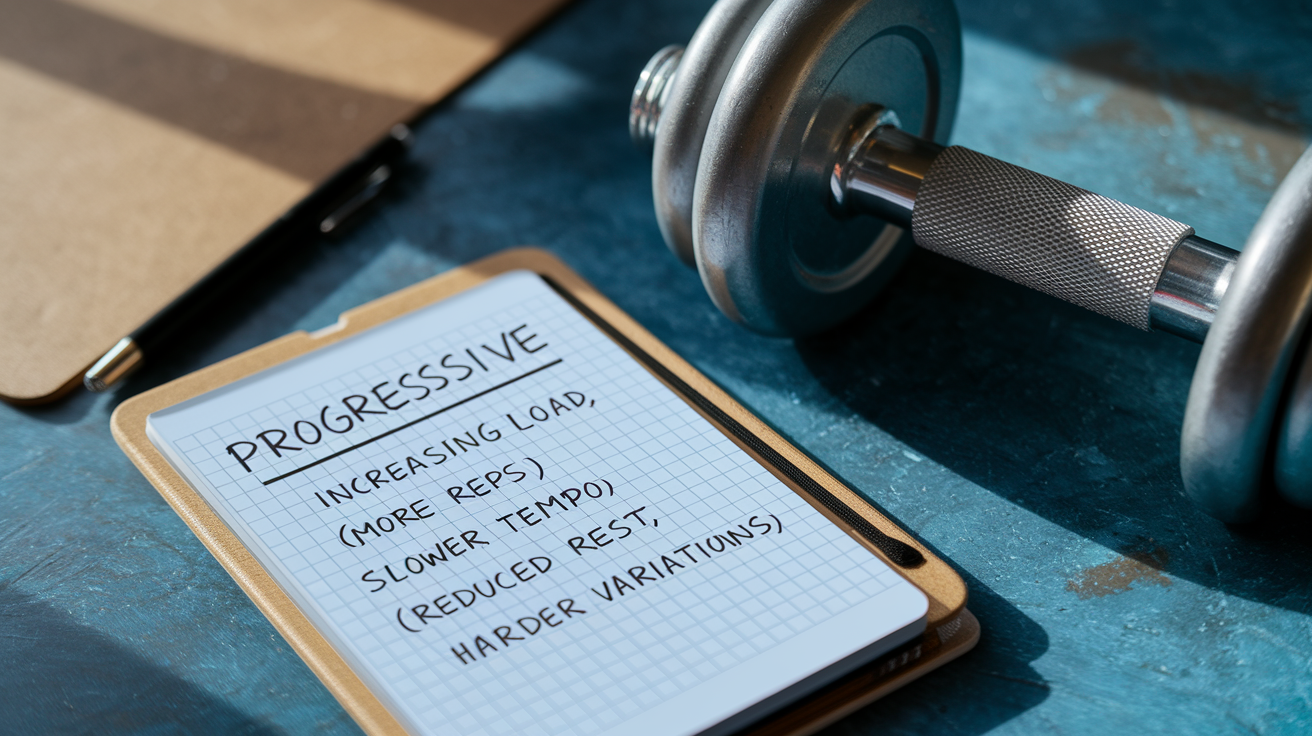
Progressive overload is the practice of gradually increasing the demand placed on your muscles over time, which forces adaptation and builds strength. For beginners, this doesn’t mean adding weight every week. It can mean performing one extra rep per set, slowing down your tempo to increase time under tension, or reducing rest between exercises to raise the cardiovascular challenge. Small, consistent increases create long-term results without overwhelming your recovery capacity or technique.
Five progression options to keep getting stronger:
- Increase Load: Add 1 to 2 lb to your dumbbells once you can complete all reps with solid form and a few reps left in the tank.
- Add Reps: If using a rep-based format, increase from 10 to 12 reps per exercise before increasing weight.
- Slow Tempo: Add a 3-second eccentric (lowering phase) to each rep to increase muscle tension without adding load.
- Reduce Rest: Cut rest intervals from 20 seconds to 15 seconds, or from 30 seconds to 20 seconds between exercises.
- Use Harder Variations: Swap easier moves for more challenging versions, like moving from incline push-ups to floor push-ups, or from split squats to reverse lunges.
Track your progress by writing down the weight, reps, and how the session felt in a simple notebook or phone app. Note when a workout starts to feel easier, then apply one of the five progressions above during your next session. Aim to progress one variable every 2 to 3 weeks, which gives your body time to adapt without rushing into overtraining or form breakdown.
Weekly Planning for Multiple 20-Minute Beginner Strength Sessions at Home

An effective weekly plan includes 3 to 5 short strength sessions spaced across the week, with at least one full rest day between harder efforts. This frequency allows your muscles time to recover while building consistency and movement skill. If you’re new to training or managing a busy schedule, start with 3 sessions (like Monday, Wednesday, Friday) and add a fourth or fifth session once that rhythm feels sustainable.
| Day | Focus | Duration |
|---|---|---|
| Monday | 20-minute full-body strength | 20 minutes |
| Tuesday | Rest or 15-minute walk | 15 minutes (optional) |
| Wednesday | 20-minute full-body strength | 20 minutes |
| Thursday | Rest or gentle yoga/stretching | 10 to 15 minutes (optional) |
| Friday | 20-minute full-body strength | 20 minutes |
| Weekend | Active recovery or rest | Optional light activity |
Adjust volume for fatigue by reducing the number of circuits, cutting one exercise from your list, or swapping a strength day for a mobility-focused recovery session. If you’re sore, tired, or fighting off a cold, it’s better to dial back intensity and keep moving lightly than to skip the week entirely. Consistency beats perfection, and showing up for a lighter session still reinforces the habit and maintains your baseline fitness.
Safety Essentials for a 20-Minute Beginner Strength Workout at Home

Safe movement protects your joints, builds strength in the right muscle groups, and prevents the compensations that lead to strains or chronic pain. Beginners often rush through reps or ignore form cues when they’re tired, which shifts load away from the target muscles and onto passive structures like ligaments and tendons. Taking time to set up correctly, breathe intentionally, and stop when form breaks down creates a foundation for long-term progress without setbacks.
Six essential safety cues to follow:
- Neutral Spine: Keep your lower back in a natural curve, not rounded or hyper-extended, during all lifts and holds.
- Core Engaged: Brace your abs as if preparing for a light punch to your stomach, which stabilizes your spine and pelvis.
- Controlled Eccentrics: Lower the weight or your body slowly (2 to 3 seconds) to maintain tension and protect joints.
- Knee Alignment: Keep knees tracking over toes during squats and lunges, without caving inward or drifting too far forward.
- Proper Breathing: Exhale during the hard part of the lift (like pressing up or standing), inhale during the easier phase (like lowering).
- Avoid Elbow Flare: Keep elbows at a 45-degree angle or closer to your torso during presses and push-ups to protect your shoulders.
Stop or modify if you feel sharp pain, dizziness, or if your form breaks down and you can’t correct it with a verbal cue. Muscle fatigue is normal and expected, but joint pain or instability is a signal to reduce load, adjust your setup, or switch to an easier variation. Listen to those signals and adjust in real time rather than pushing through and risking a strain that sidelines you for weeks.
Final Words
You now have a simple, ready-to-use plan: a short warm-up, five beginner-friendly strength moves, an optional dumbbell line, a quick cool-down, and a clear 40 seconds on / 20 seconds off format to run it.
You also got tips for equipment, safe progressions, easy modifications for aches or limitations, and a weekly approach to keep momentum without overdoing it.
Use this 20-minute beginner strength workout at home a few times a week and build from there. Little, consistent steps add up.
FAQ
Q: How should I structure a 20-minute beginner strength workout at home?
A: The 20-minute beginner strength workout at home should start with a 2–4 minute dynamic warm-up, include two circuit blocks of compound moves, and end with a brief cool-down stretch.
Q: What exact exercises should a beginner include in this full-body 20-minute circuit?
A: The exact exercises a beginner should include are a warm-up block, bodyweight squat, glute bridge, push-up progression, reverse lunge, bent-over or band row, an optional dumbbell press variation, and a cool-down.
Q: How do I warm up quickly and why are those moves important?
A: A quick warm-up matters because it primes joints, activates muscles, and improves movement quality; use dynamic patterns like squat with overhead reach and a hip hinge with rotation for two to four minutes.
Q: Which cool-down stretches are best after a 20-minute strength session?
A: The best cool-down stretches after a 20-minute strength session are a toe touch with chest opener and a standing quad stretch, holding each 20–30 seconds to release hips, hamstrings, and chest.
Q: How do I run the workout using 40 seconds on and 20 seconds off?
A: Running the workout with 40 seconds on/20 seconds off means perform each exercise for 40 controlled seconds, rest 20 seconds, rotate through five exercises, and repeat for two to three rounds.
Q: What minimal equipment do I need for a 20-minute home strength routine?
A: The minimal equipment you need is optional—bodyweight works fine; one pair of dumbbells (5–25 lb) and a resistance band add variety; a chair and mat are helpful for support and comfort.
Q: How often should beginners do these 20-minute strength sessions each week?
A: Beginners should do 20-minute strength sessions three to five times per week, aiming for at least two dedicated strength days while balancing rest or active recovery based on how you feel.
Q: How can I modify exercises for knee pain, limited mobility, or postpartum needs?
A: To modify for knee pain, limited mobility, or postpartum, swap reverse lunges for split squats or chair-assisted squats, use incline push-ups, reduce range of motion, and slow the tempo for control.
Q: How can I progress this 20-minute workout over weeks without adding time?
A: You can progress the 20-minute workout by increasing weight, adding a few reps, trimming rest by 5–10 seconds, slowing the lowering phase, or choosing slightly harder variations over time.
Q: What safety cues and signs should I watch for during a 20-minute beginner strength workout?
A: The safety cues to watch for are a neutral spine, braced core, knees tracking over toes, controlled lowering, steady breathing, and stop or modify if you feel sharp pain or unusual dizziness.
