

What if sitting is the real reason your hips feel stuck every morning?
This 10-minute morning flow meets your body where it is and loosens stiffness fast.
You’ll start with breathing and joint rotations to wake the nervous system, then move through hip circles, leg swings, targeted hip flexor stretches and glute work, finishing with a short reset.
It’s easy to scale, do a quick 5-minute check-in on busy days or add time and load when you’ve got it, so you actually feel mobile before your day begins.
A Complete Morning Hip Mobility Flow You Can Start Today
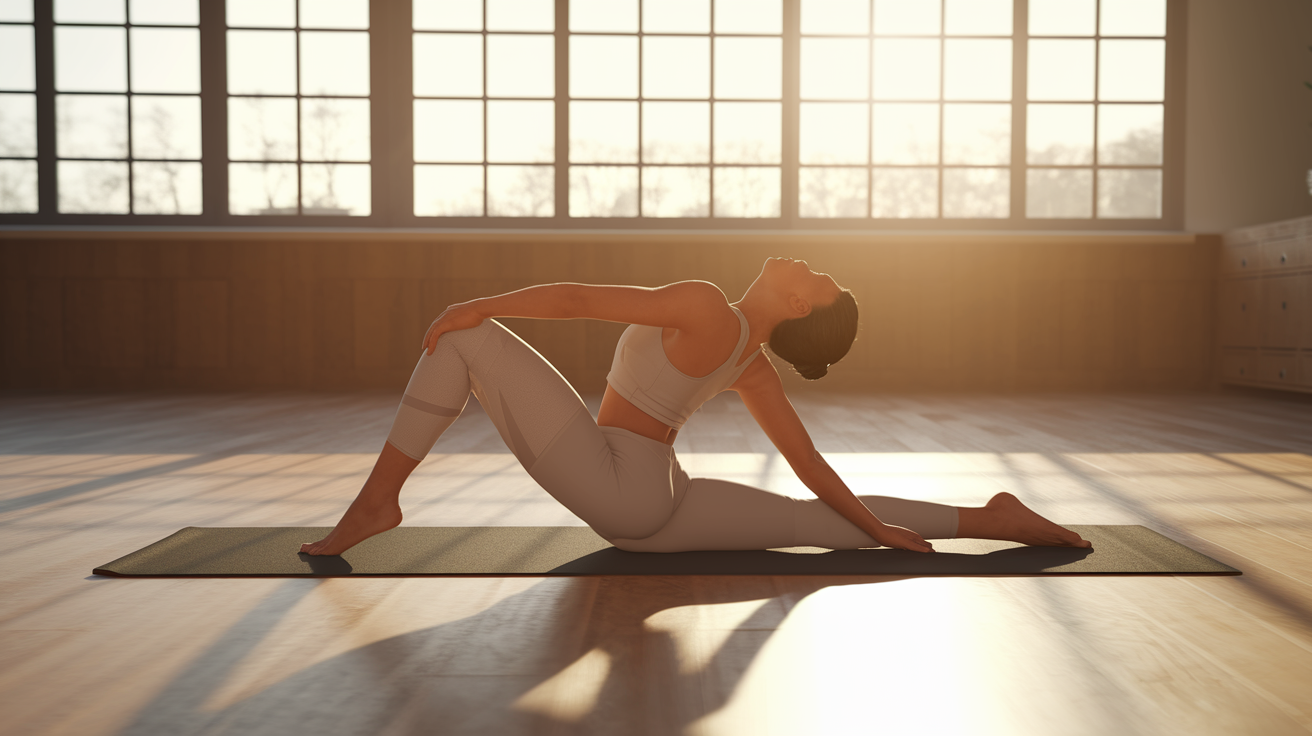
This 10-minute routine starts where your hips are right now and builds range through a structured progression that matches how your body wakes up. You’ll move through breathing practice, joint rotations, lower body spin-up drills, targeted hip flexor and glute work, and a short reset before you leave the house. The sequence follows a minute by minute timeline that makes it easy to track even when you’re half awake.
You can shorten it to 5 minutes by running through one round of each movement at a comfortable pace, or stretch it to 15 by adding a second set or spending extra time on the positions that feel most useful. Beginners should slow the tempo and aim for 30 to 45 seconds per movement. Intermediate movers can hold each drill for 45 to 60 seconds and add light pulses or controlled load. Advanced options include longer holds, loaded progressions like banded hip circles or weighted lunges, and more complex rotation sequences. Always switch sides. Do them both, even if only one hip feels tight, to build long term balance.
The structure frontloads readiness before your day’s demands arrive. Breathing and joint rotations prime your nervous system and synovial fluid. The lower body spin-up opens hip circles, leg swings, and dynamic lunges. Hip flexor stretches and glute activation drills target common sticking points. The cool down resets tension so you walk out the door feeling mobile, not rushed.
The 10 Minute Morning Hip Mobility Routine:
-
0:00 to 1:00 — Breathing practice spin-up. Slow diaphragmatic breaths to settle your nervous system and prepare for movement.
-
1:00 to 3:00 — Joint rotations. Circles for hips, knees, ankles, and shoulders. Move through pain free ranges in both directions.
-
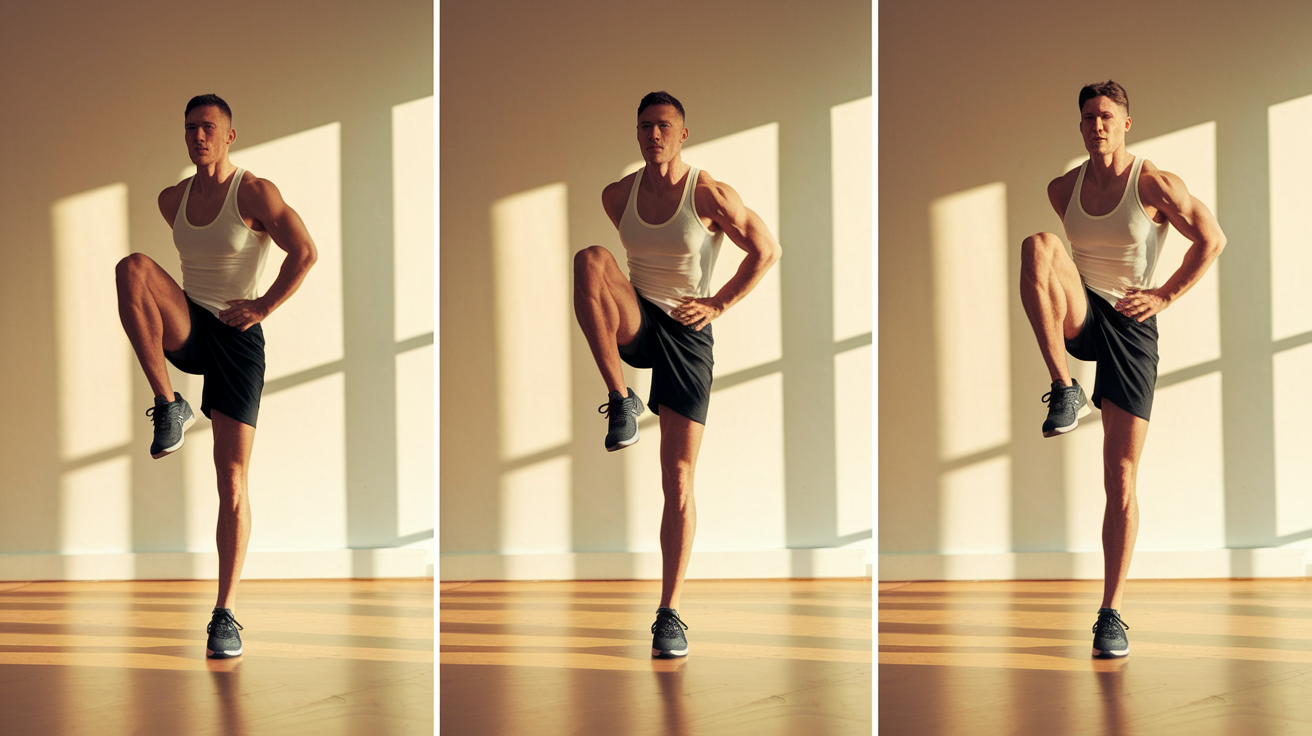
3:00 to 6:00 — Lower body spin-up. Hip circles, leg swings, dynamic lunges. Perform each movement on both sides.
-
6:00 to 8:00 — Targeted hip mobilizations. Hip flexor stretches and glute activation drills. Focus on positions that challenge you most.
-
8:00 to 10:00 — Cool down and short breathing reset. Gentle stretches or slow movements to relax tissues before starting your day.
Understanding Why Tight Hips Happen and How Morning Mobility Helps
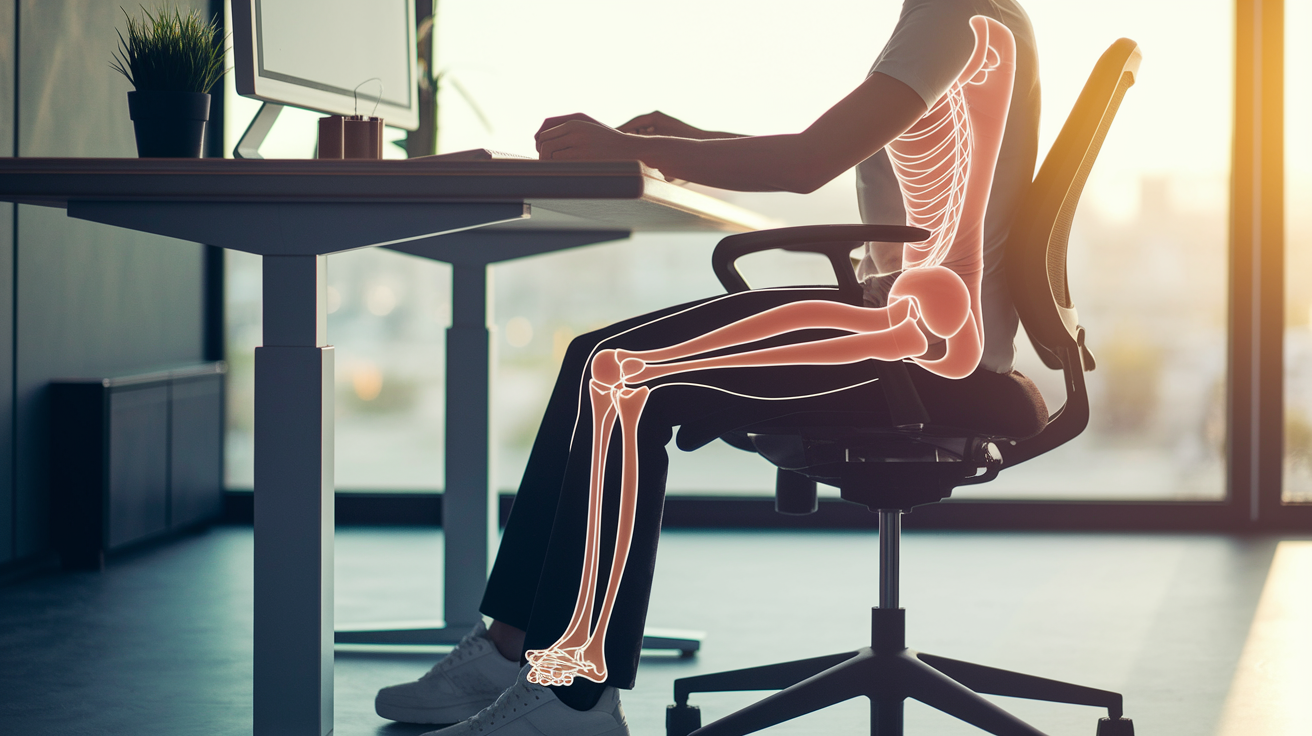
Your hips get tight from prolonged sitting, repetitive movement patterns, and muscle imbalances that develop when you spend most of the day in one position. Desk work shortens your hip flexors and weakens your glutes. Over time, you’ll notice a shorter walking stride, discomfort when you stand up after sitting, and a stiff, locked feeling when you try to move through larger ranges. Running or lunging feels awkward because your hips can’t access the positions you’re asking for.
Morning mobility helps because it builds active range before your body settles into the day’s patterns. Mobility is the ability to move through extended ranges under control, not just passive flexibility where someone else pushes you into a stretch. When you actively control your hip range in the morning, you spread mechanical stress across more tissue, increase blood flow, and reduce the risk of compensations that lead to pain.
You’re also training your nervous system to trust those ranges. That makes everyday movement smoother and more efficient.
Tight hips show up in predictable ways. Catch them early and you can reverse the stiffness before it becomes a chronic issue.
Common signs of hip tightness:
• Shorter stride length when walking or running, especially noticeable when you’re trying to move quickly
• Discomfort or stiffness when standing up after sitting for 30 minutes or longer
• Reduced range when you try to lift your knee toward your chest or rotate your thigh outward
• Lower back tension or compensatory movement patterns during squats, lunges, or deadlifts
Technique Tips and Deeper Cues for Core Hip Mobility Movements

Hip Circles (Control & Range Cues)
Stand on one leg and lift the opposite knee to hip height. Trace slow circles with your knee, moving from small circles outward as your hip warms up. Keep your pelvis level and your standing leg slightly bent. If your pelvis tilts or your torso leans, reduce the circle size until you can control the movement without compensation.
Reverse the circle direction halfway through the set. Control matters more than size. Before you make it bigger, make it smoother.
Leg Swings (Alignment & Balance Tips)
Hold a wall or doorframe with one hand and swing the opposite leg forward and back, then side to side. Keep your torso tall and your pelvis stable. If you’re swaying or twisting, you’re swinging too high. Start with smaller swings and let momentum build naturally.
Breathe out on the forward or side swing to stay relaxed. If balance is a challenge, plant your standing foot and engage your glute on that side to anchor the movement.
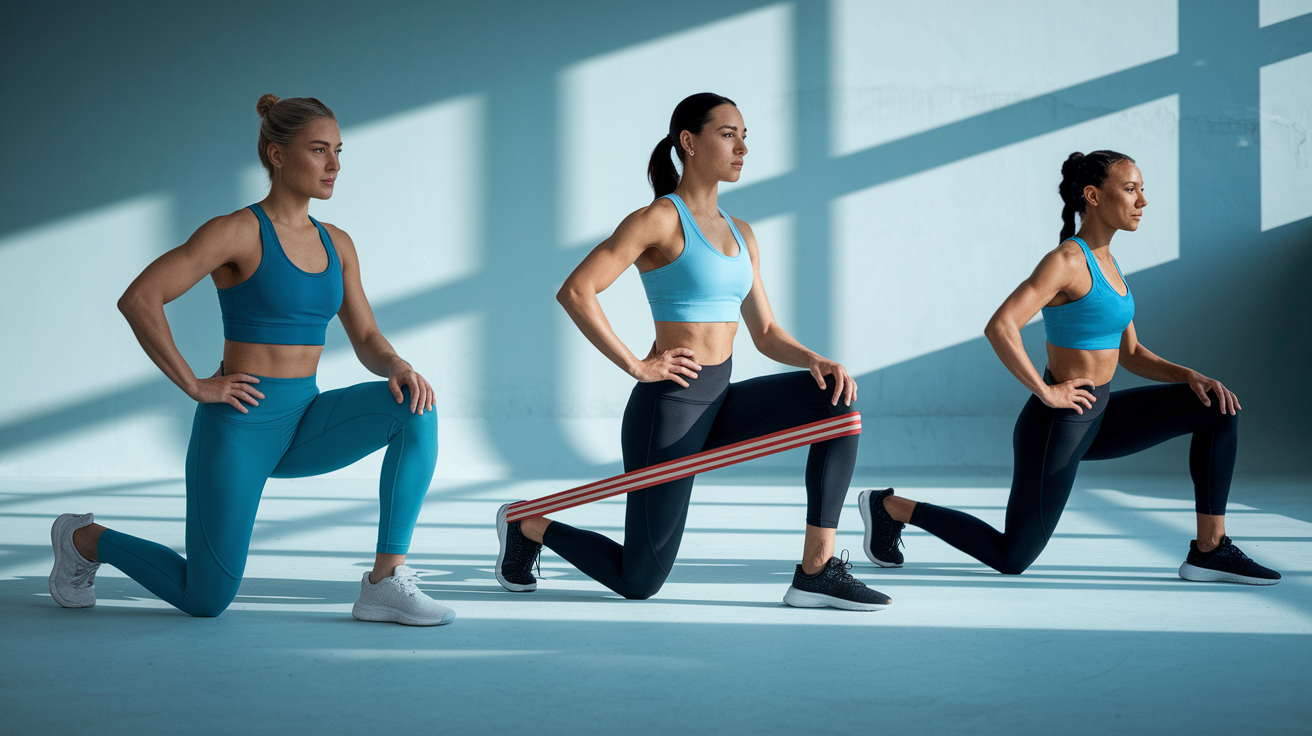
Dynamic Lunges (Depth & Hip Drive Cues)
Step forward into a lunge and lower until your front thigh is parallel to the floor, or as far as you can control without your knee caving in or your torso collapsing forward. Press through your front heel to stand, driving your hips forward at the top. Keep your ribcage stacked over your pelvis throughout the movement.
If your lower back arches hard at the bottom, shorten your stance or reduce the depth until you can hold a neutral spine. Add a small pulse at the bottom to work end range hip flexor length.
Hip Flexor Mobilization (Pelvic Positioning Focus)
Kneel in a half kneeling position with your front foot flat and your back knee on a soft surface. Before you lean forward, tuck your pelvis slightly by thinking “belt buckle toward ribs.” Then shift your hips forward until you feel a stretch in the front of your back hip.
Don’t let your lower back arch to create the stretch. Stretch the hip, not the spine. Hold for 30 to 60 seconds and breathe into the tight side. If you feel pinching in the front of your hip, adjust your pelvis position or reduce how far forward you lean.
Glute Activation Variations (Bridge/Clamshell Options)
For bridges, lie on your back with your knees bent and feet flat. Press through your heels and lift your hips until your body forms a straight line from knees to shoulders. Squeeze your glutes at the top and avoid overarching your lower back.
For clamshells, lie on your side with your knees bent and feet together. Lift your top knee while keeping your feet touching, focusing on rotating from your hip rather than rolling your pelvis back. Both movements teach your glutes to fire before you ask them to work in dynamic positions like lunges or squats.
90/90 Rotations (Rotation Control Strategies)
Sit on the floor with one leg in front of you, knee bent at 90 degrees and shin parallel to your torso. Position your back leg with the knee bent 90 degrees and shin perpendicular to your body. This setup creates internal rotation in your front hip and external rotation in your back hip.
Sit tall and lean gently toward your front knee to deepen the internal rotation stretch. Switch sides slowly and focus on keeping both sit bones on the floor. If your hips lift or your torso collapses, use a yoga block or folded towel under your hip for support until your range improves.
Quick 5 to 10 Minute Morning Hip Mobility Options (Beginner to Advanced)
You don’t need the full 10 minutes every day to see results. A 5 minute check-in hits the most important positions and keeps your hips moving on busy mornings. The standard 10 minute option adds more sets and controlled reps for deeper range work. An extended 15 minute session includes loaded progressions or extra holds on your tightest positions.
All three formats follow the same structure. Breathing, joint rotations, lower body spin-up, targeted hip work, and a short reset. But they adjust pacing, sets, and intensity to match your schedule and energy.
Choose the option that fits your morning and your current mobility level. On busy days, the 5 minute version is enough to prevent your hips from locking up. On rest days or weekends, the 15 minute option builds more lasting range and strength. Consistency with the short version beats sporadic long sessions every time.
| Duration Option | What’s Included | Who It’s Best For |
|---|---|---|
| 5 minutes | 1 set of each movement, short transitions, quick breathing reset at the end | Busy mornings, beginners, or days when you need a fast baseline movement check-in |
| 10 minutes | 1 to 2 sets per movement, moderate tempo, 30 to 60 seconds per drill with controlled reps | Standard morning routine, intermediate movers, or anyone building consistent hip mobility |
| 15 minutes | 2 to 3 sets, longer holds, loaded variations like banded circles or weighted lunges, extended cool down | Advanced movers, rest days, or sessions when you have time for deeper range work |
Modifications and Mobility Variations for Different Levels
Start at the level where you can control every rep without pain or compensation. Beginners should slow the tempo and aim for 30 to 45 seconds per movement. Focus on smooth, controlled range and steady breathing. If a position feels too intense, reduce the depth or hold time until your hips adapt.
Intermediate movers can hold each drill for 45 to 60 seconds, add light pulses or controlled load, and work through moderate discomfort without pushing into sharp pain. Advanced options include longer holds, loaded progressions with bands or weights, and more complex rotation sequences. After intense sessions, insert a rest day to let tissues recover.
Always perform bilateral work. Even if one hip feels tighter, train both sides. Switching sides builds long term balance and prevents compensations from locking in. If you skip the less limited side, you reinforce the asymmetry. “Do them both” is the rule, even when one side feels easy.
The side to side rule applies to every movement in the routine. Spend equal time on both hips, regardless of where you feel the tightness. Progress slowly and listen to the difference between discomfort (normal, productive) and pain (sharp, blocking, a sign to back off).
Level differences summary:
• Beginner: 1 set, 30 to 45 seconds per movement, slower tempo, focus on breathing and range control
• Intermediate: 1 to 2 sets, 45 to 60 seconds per movement, moderate pace, add light dynamic load like bodyweight pulses
• Advanced: 2 to 3 sets, full reps per side, loaded progressions or added mobility complexity, rest days after strenuous sessions
Tools, Props, and Optional Equipment for Improving Hip Mobility
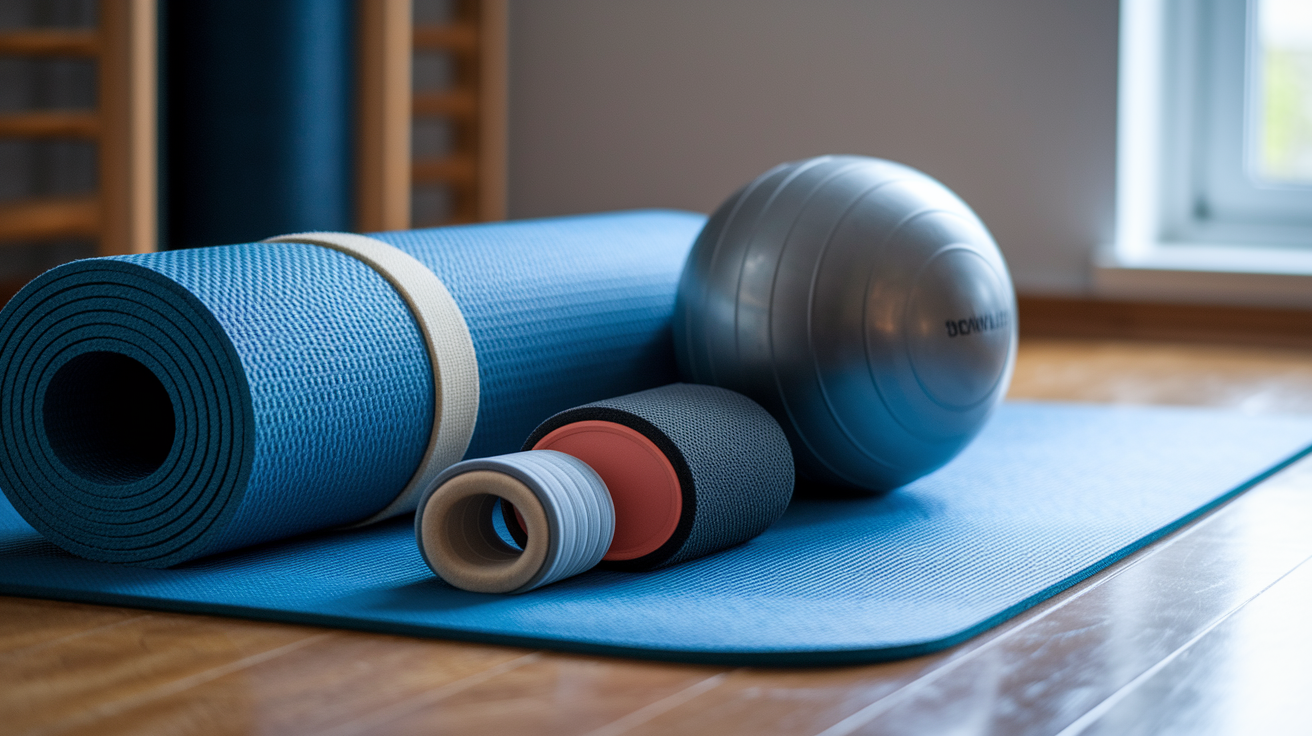
You don’t need equipment to run the core routine, but a few simple tools can deepen certain positions and add soft tissue work when you have extra time. A yoga mat provides cushioning for kneeling positions and floor drills. A foam roller or lacrosse ball helps release tight spots in your hip flexors, glutes, and IT band before or after the routine. A resistance band adds load to hip circles and glute activation drills, making them more challenging as your control improves.
Soft tissue work fits best in the evening, especially on busy days when you can’t fit a full morning routine. Spend 10 to 15 minutes with a foam roller or massage ball targeting your hips, quads, and adductors before bed. This supports recovery and sets up better range for the next morning’s mobility session.
Simple tools to add:
• Yoga mat for comfort during kneeling and floor based drills
• Foam roller for releasing hip flexors, glutes, quads, and IT band
• Lacrosse ball or massage ball for deeper, targeted hip and glute pressure
• Resistance band (light to medium) for adding load to hip circles, clamshells, and glute bridges
Hip Mobility and Daily Life: Desk Jobs, Post-Sitting Tightness, and Better Movement Patterns

Desk workers feel hip stiffness more than anyone. Sitting for hours shortens your hip flexors, weakens your glutes, and compresses the front of your hip joint. When you finally stand up, your hips feel locked and your stride is shorter. Over time, this pattern shows up as lower back tension, compensatory movement during workouts, and that heavy, stiff feeling at the end of long days.
Morning hip mobility counters this by building range before you sit down. You’re teaching your hips to move through full, controlled ranges while your nervous system is fresh. This makes sitting less damaging and standing up less uncomfortable.
After three weeks of daily practice, most people notice the usual locked feeling after long seated periods is noticeably reduced. Walking, running, and standing all feel smoother.
You can also insert short mobility resets during the workday to prevent stiffness from building up. These quick drills take less than five minutes and keep your hips from locking into one position all day. Pair them with reminders to stand and walk every hour for the best results.
Workplace friendly mobility resets:
-
Stand and perform 10 slow hip circles in each direction, keeping your pelvis level and your standing leg slightly bent.
-
Step into a half kneeling position (use a chair or desk for balance) and hold a hip flexor stretch for 30 seconds per side.
-
Sit at the edge of your chair and perform seated 90/90 rotations, switching legs every 30 seconds for 2 to 3 minutes total.
Tracking Hip Mobility Progress and Knowing When to Seek Help

Hip mobility improves gradually, so track small changes in range, control, and how your hips feel during daily activities. Test your progress every two weeks using simple self-assessments that measure active range and movement quality. If you see improvements in stride length, easier standing after sitting, or smoother lunges, your routine is working.
If pain increases, range decreases, or you notice sharp pinching during any movement, back off and consider professional guidance.
Light morning mobility can be done daily because it’s not strenuous. More intense stretching protocols or loaded mobility sessions require rest days between sessions to allow tissues to adapt. Follow the pain versus discomfort rule: discomfort (pulling, stretching, mild tension) is productive. Pain (sharp, blocking, radiating) is a signal to stop and reassess.
| Progress Marker | How to Test It | Frequency |
|---|---|---|
| Hip flexion range | Lie on your back and pull one knee toward your chest without your lower back lifting. Measure how close your thigh gets to your torso. | Every 2 weeks |
| Walking stride length | Walk 20 steps at a normal pace and notice if your stride feels longer or more fluid than it did two weeks ago. | Weekly |
| 90/90 sit comfort | Sit in a 90/90 position and track whether you can sit taller, lean forward more, or hold the position longer without discomfort. | Every 2 weeks |
Final Words
in the action, you learned a simple, 10-minute morning hip mobility flow with breathing, joint rotations, dynamic warm-up, hip flexor stretches, glute activation, and a short cool-down.
It also covered why hips tighten, technique cues, level-based modifications, quick 5 to 10 minute options, helpful tools, and ways to track progress or know when to seek help.
Try the flow for a week, pick the beginner or intermediate timing that fits your morning, and tweak as needed. A morning mobility routine for tight hips can make standing, walking, and daily movement feel easier. Small, consistent steps win.
FAQ
Q: What is a simple 10-minute morning hip mobility routine?
A: A simple 10-minute morning hip mobility routine follows a minute-by-minute flow: breathing (0–1), joint rotations (1–3), lower-body spin-up (3–6), hip flexor stretches and glute activation (6–8), cool-down/reset (8–10).
Q: Why do hips get tight and how does morning mobility help?
A: Hips get tight from long sitting and shortened stride; morning mobility wakes tissues, restores active range of motion, and spreads mechanical stress so standing and walking feel easier all day.
Q: What are common signs of hip tightness?
A: Common signs of hip tightness include reduced stride length, stiffness after sitting, noticeable discomfort when standing up, and limited hip range of motion that affects daily movement.
Q: How often should I do the routine and how long should each movement last?
A: You should do light morning mobility daily; beginners use 30–45 seconds per movement, intermediate 45–60 seconds, and advanced add load or complexity with planned rest days after tough sessions.
Q: How should I progress the routine over time?
A: To progress, increase time per move, add range or load, add a set, or try harder variations gradually—prioritize form and give yourself rest after more intense sessions to avoid overload.
Q: Which exercises are included in the routine?
A: The routine includes hip circles, leg swings, dynamic lunges, glute activation drills, hip flexor mobilizations, and joint rotations—perform each on both sides with controlled tempo.
Q: Can I do this routine without equipment and what props help?
A: You can do the routine without equipment; optional props like a yoga mat, foam roller, lacrosse ball, or soft-tissue device help comfort, deeper release, and pre-bed recovery on busy days.
Q: When should I stop or seek professional help for hip pain?
A: You should stop and seek professional help if you feel sharp pain, swelling, numbness, or worsening symptoms—get a clinician’s guidance for persistent or severe issues rather than pushing through.
Q: What breathing and form cues should I use during hip mobility?
A: Use calm breathing—inhaling to prepare and exhaling through movement—keep the ribcage stacked over hips, pelvis neutral, move slowly, and focus on control to reduce tension and protect joints.
Q: How can I fit quick hip mobility into a desk job or commute?
A: You can fit quick mobility into a desk job by doing 1–3 short resets like standing hip circles, seated leg swings, or half-lunges by your chair during breaks to undo sitting stiffness.
