

You don’t need a gym to build real strength — bodyweight work does the job.
But most beginner plans are either too vague or too advanced.
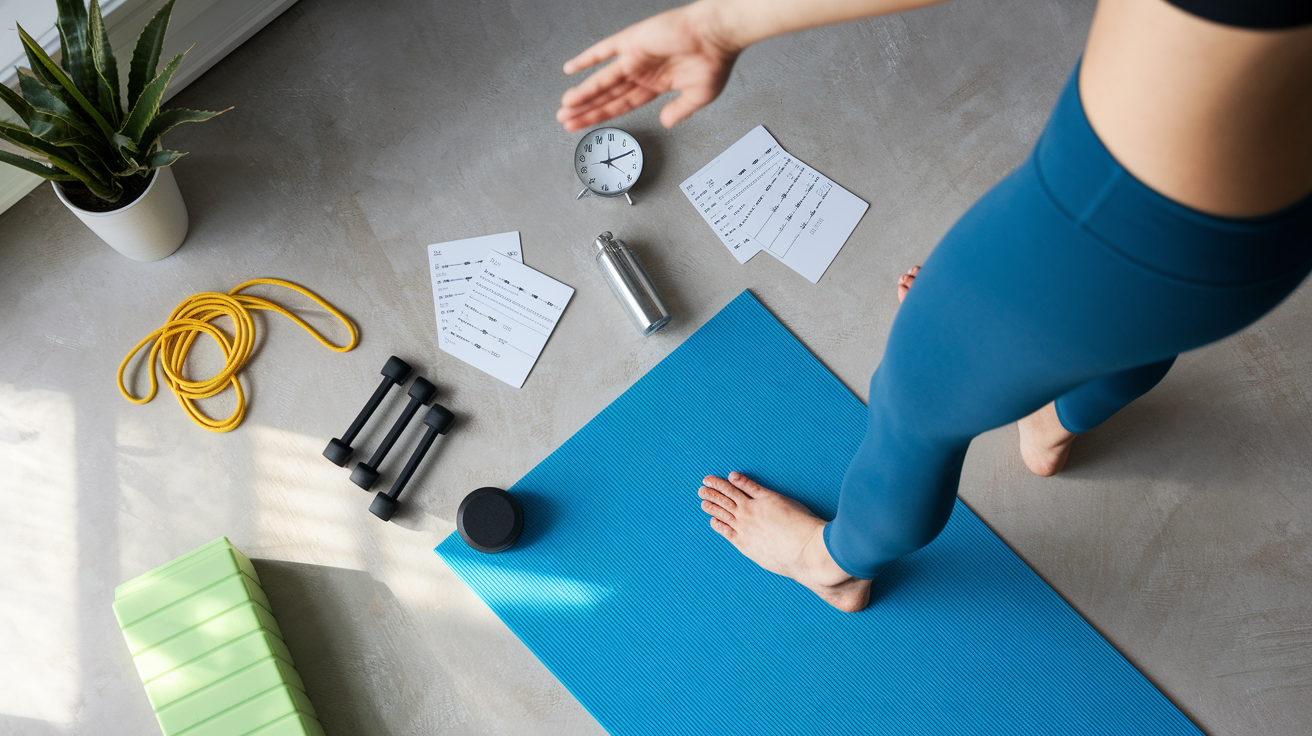
This four-week calisthenics workout plan for beginners gives a clear, full-body routine you can start today.
You’ll get warm-ups, simple progressions (easier and harder options), and a two- or three-day weekly schedule that fits busy lives.
Follow it for four weeks and you’ll build movement skill, better form, and the base to progress safely.
Beginner-Friendly Calisthenics Plan for Immediate Use

A beginner calisthenics workout plan works best as a full-body routine done two to three times per week. You’re training all major movement patterns in one session: pushing, pulling, squatting, core work. Full-body training gives you enough recovery time between workouts while building balanced strength across your entire body.
Most beginners start with three sets per exercise. Push-ups, dips, and rows usually fall in the 6–12 rep range per set. Squats might go a bit higher at 10–15 reps. Core holds like planks and hollow holds last 20–60 seconds. If a movement feels too hard at these rep ranges, use an easier version (incline push-up, band-assisted dip, bent knees for inverted rows). If you can complete all sets at the higher end with good form, try a harder progression or add another set.
Here’s one sample full-body beginner session:
- Warm-up (6–10 minutes): cardio, mobility, band prep, activation drills
- Incline or standard push-ups: 3 sets of 6–12 reps
- Inverted rows (knees bent if needed): 3 sets of 6–12 reps
- Bodyweight squats: 3 sets of 10–15 reps
- Plank: 3 sets of 20–60 seconds
- Hollow body hold: 2–3 sets of 20–60 seconds
Rest between sets should be 60–90 seconds for most beginners. Enough to catch your breath, but not so long that everything cools down. Perform this workout two to three times per week with at least one rest day between sessions (Monday/Thursday or Monday/Wednesday/Friday work well). This frequency supports recovery while letting you practice movement patterns consistently, which builds skill and strength at a pace you can actually maintain.
Warm-Up Routines for Beginner Calisthenics Sessions
Warming up before calisthenics reduces injury risk and improves how you move during the workout. A proper warm-up gradually gets your heart rate up, increases blood flow to muscles, primes joints for bigger ranges of motion, and wakes up key stabilizers.
A complete beginner-friendly warm-up includes:
3–5 minutes of light cardio. Jumping jacks, invisible jump rope, or a brisk walk to raise body temperature and heart rate.
Mobility drills. Wrist circles (10 reps each direction), shoulder pass-throughs with a band or broomstick (10 reps), hip circles (10 each leg), cat-cow spinal flexion (8–10 reps).
Band activation. 2–3 sets of 15 reps for band pull-aparts, face pulls, and external rotations to wake up rear delts and rotator cuffs.
Scapular activation. Scapular pull-ups (5–8 reps hanging from a bar, retracting shoulder blades without bending elbows) or scapular push-ups (5–8 reps in a plank, protracting and retracting shoulder blades).
Light core activation. 1–2 short hollow holds (10–20 seconds) or superman holds (10–20 seconds) to engage the core and posterior chain before loaded movements.
The entire warm-up should take 6–10 minutes total. If you only have a few minutes, focus on the cardio and one or two of the mobility and activation drills that match the primary movements in your workout (shoulder prep before push-ups and dips, hip prep before squats). Skipping the warm-up or rushing through it increases the chance of strain and reduces the quality of reps during your working sets.
Foundational Beginner Calisthenics Exercises Explained
Mastering a small set of foundational bodyweight movements builds the platform for every other calisthenics skill. Beginners should focus on eight core exercises that cover all major movement patterns: push-ups, strict bar dips, inverted rows, pull-ups, handstand holds, bodyweight squats, planks, and hollow holds. Each movement scales up or down depending on your current strength and mobility, which makes them appropriate for day one and still challenging months later.
Form and body position matter more than rep count at this stage. Rushing through sloppy reps builds poor movement habits and increases injury risk. Move through a full range of motion under control, pause briefly at the hardest part of each rep, and reset your position between reps if necessary.
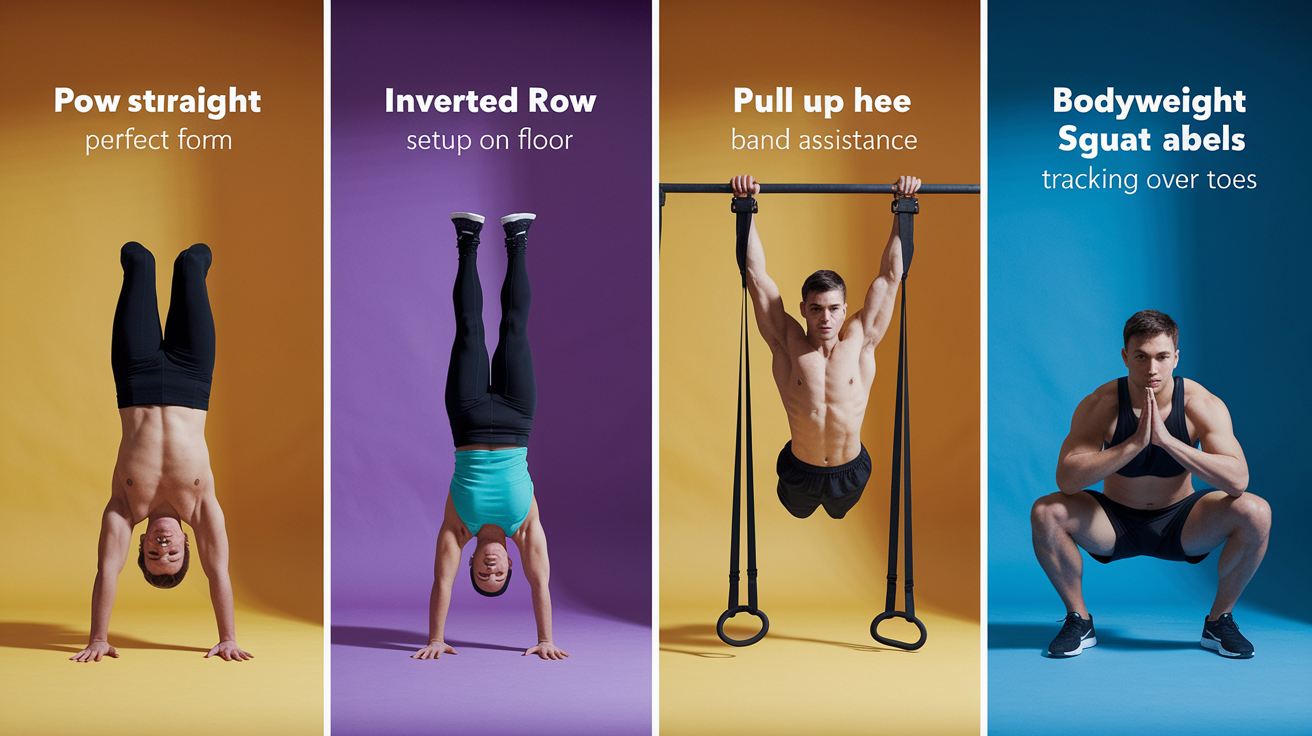
Push-Up Technique
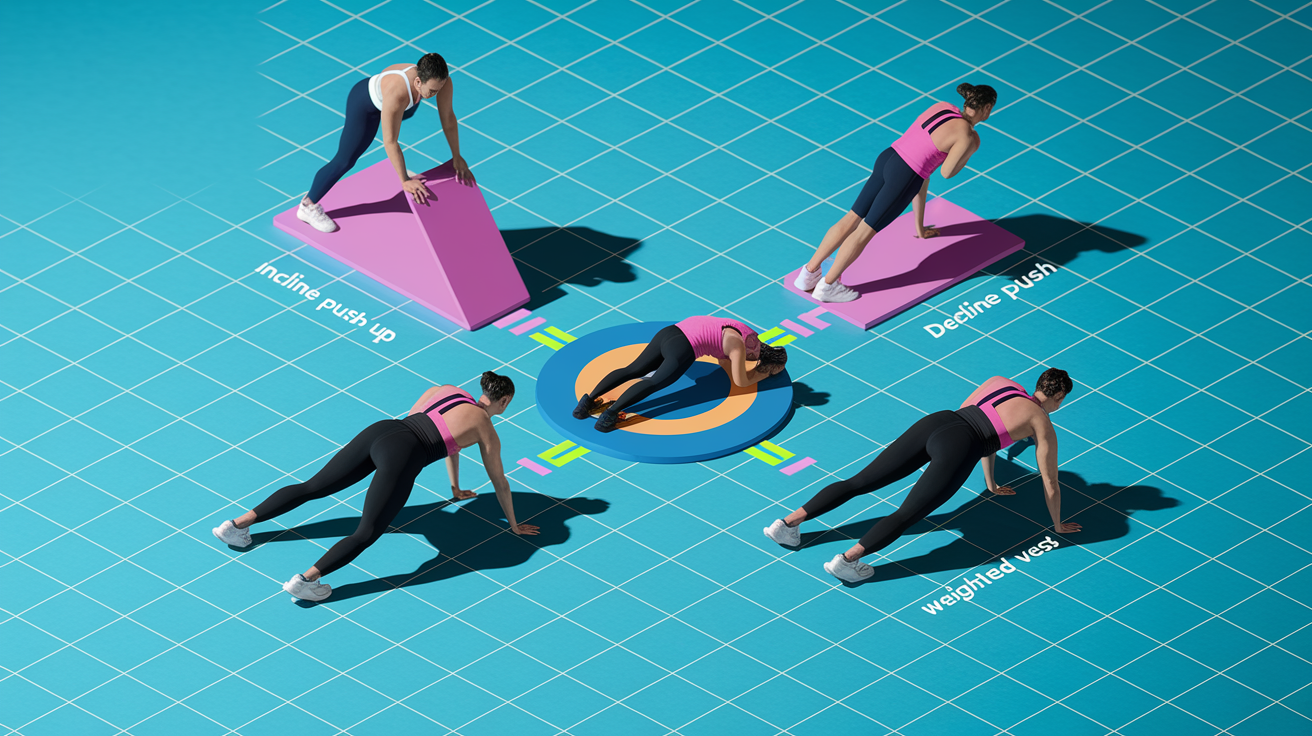
Start in a high plank with hands placed slightly wider than shoulder width and fingers pointed forward. Engage your glutes and core to maintain a straight line from head to heels throughout the movement. As you lower, let your elbows bend to about 45 degrees relative to your torso (not flared out to 90 degrees). Lower until your chest hovers an inch or two above the floor, then press back up.
If standard push-ups are too difficult, regress by placing your hands on an elevated surface like a chair, bench, or countertop. The higher the surface, the easier the movement. Lead with your chest and don’t let your hips sag. To progress, move to a lower surface or eventually to the floor. Once floor push-ups feel manageable, add difficulty by elevating your feet on a low box or bench (decline push-ups).
Inverted Row Setup
Set a barbell in a rack or use gymnastic rings hung at waist height. Lie underneath the bar with your body extended and heels on the floor. Grab the bar with an overhand grip just wider than shoulder width. Keep your body in a straight line from heels to head, squeeze your glutes, and pull your chest toward the bar by driving your elbows back and squeezing your shoulder blades together.
To make inverted rows easier, bend your knees and place your feet flat on the floor. This shortens the lever arm. As you get stronger, straighten your legs fully. To progress further, lower the bar height so your body becomes more horizontal, which increases the load. Pause at the top of each rep with your chest near the bar before lowering back down with control.
Pull-Up Beginner Guidance
Grab a pull-up bar with an overhand grip slightly wider than shoulder width. Start from a dead hang with arms fully extended and shoulders engaged (not relaxed and shrugging up toward your ears). Pull yourself up by driving your elbows down and back until your chin clears the bar. Lower back to the dead hang position under control.
Most beginners can’t perform strict pull-ups at first. Use a thick resistance band looped over the bar and place one knee or both feet in the loop to provide assistance. Thicker bands give more help. Another effective regression is ring rows or assisted pull-up machines if available in a gym. Try to complete 3–4 sets of 4–6 assisted reps, gradually reducing band thickness over weeks as you build pulling strength. The goal benchmark is 10 strict pull-ups, which may take several months of consistent practice.
Bodyweight Squat Alignment
Stand with feet slightly wider than hip width and toes pointed slightly outward (roughly to “10 and 2” on a clock face). Keep your chest upright and start the movement by pushing your hips back as if sitting into a chair. Descend until your thighs are parallel to the floor or slightly below if your ankle and hip mobility allow. Drive through the soles of your feet (especially your heels) and squeeze your glutes as you return to standing.
Common mistakes include letting the knees cave inward or the heels lift off the floor. Apply gentle outward pressure through your feet as you descend to keep knees tracking over toes. If you struggle to reach parallel depth without your heels lifting, work on ankle and hip mobility between sessions. To progress, slow down the lowering phase (eccentric tempo) or eventually move toward single-leg squat variations like assisted pistol squats.
Beginner Progression Methods in Calisthenics
Knowing when and how to make an exercise harder prevents stagnation and builds strength over time. The guiding principle for beginners is simple: progress when a variation becomes easy. A practical guideline is to move to a harder variation once you can complete 3–4 sets of 10–15 reps at an RPE (rate of perceived exertion) of 7 or lower. That means the reps feel moderately challenging but not close to failure.
Calisthenics offers several ways to increase difficulty without adding external weight:
Adjust body angle. For inverted rows, lower the bar so your body is more horizontal. For push-ups, elevate your feet on a box.
Reduce assistance. Switch to a thinner resistance band for pull-ups or dips, or remove the band entirely once you can perform a few unassisted reps.
Change leverage. Progress from two-leg squats to single-leg variations (step-ups, split squats, assisted pistols). Move from standard push-ups to archer push-ups or one-arm progressions.
Add external load. Wear a weighted backpack or use a dip belt with small plates once bodyweight movements feel light.
For static holds like planks, hollow holds, and handstand holds, use EMOM (every minute on the minute) protocols to build capacity. Set a timer and perform a short hold at the start of each minute, resting for the remainder. Gradually increase hold duration over weeks. Once you can hold a position for 60 seconds straight, consider a harder variation (weighted plank, hollow hold with straight arms overhead, freestanding handstand practice).
RPE is a subjective 1–10 scale where 1 is no effort, 7–8 is hard but sustainable, and 10 is maximum. Training most sets in the 7–8 range lets you challenge your muscles while maintaining good form. If your form breaks down before you reach the target rep range, regress the movement or reduce the number of reps per set. Patience and consistent practice yield better results than rushing into harder variations before you’re ready.
Complete Weekly Schedule for a Beginner Calisthenics Plan
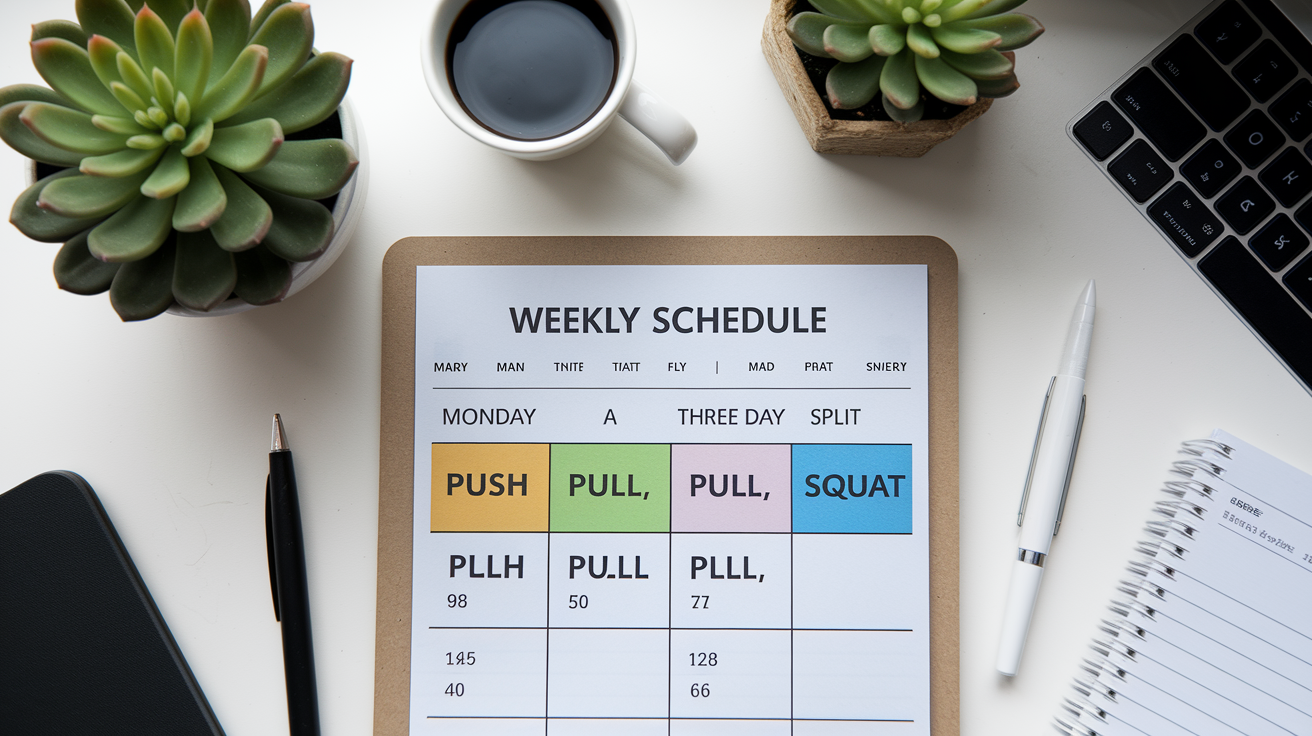
Structuring your week correctly balances training stimulus with adequate recovery. Beginners typically choose between a two-day full-body plan or a three-day split that separates upper body, lower body, and skill work. Both options work well. Pick the one that fits your schedule and recovery capacity.
| Schedule Type | Days | Key Focus |
|---|---|---|
| Option A – 2-Day Full-Body | Monday & Thursday (or similar 48–72 hour spacing) | Push-ups, inverted rows, squats, plank, hollow holds, optional handstand practice – all in one session |
| Option B – 3-Day Split | Monday (Upper), Wednesday (Lower + Core), Friday (Skills + Rows) | Day 1: Push-ups, dips, pull-up progressions, plank. Day 2: Squats, single-leg work, hollow holds. Day 3: Inverted rows, handstand holds, mobility |
Option A is the simplest starting point and works well if you have limited time or are managing other physical activities during the week. Each session hits all major muscle groups, and the 48–72 hour gap provides enough recovery for beginners. Option B allows slightly higher volume and skill practice frequency because muscle groups recover on different days, but it requires three weekly time slots.
Rest days aren’t optional. Recovery is when your muscles repair and adapt to the training stimulus. For most beginners, 24–72 hours between sessions targeting the same muscle groups is necessary to avoid overtraining. Signs you need more rest include persistent fatigue, loss of motivation, poor sleep, or muscle soreness that lasts beyond two days. Consider a deload week every 4–6 weeks where you reduce total sets or intensity by about half to allow full recovery and prevent burnout.
Safety, Recovery, and Beginner-Friendly Calisthenics Precautions

Calisthenics carries lower injury risk than heavy barbell training when exercises match your current ability, but poor form or excessive volume still causes strain. Beginners should prioritize joint health and recovery as much as the workout itself.
Watch for overtraining signs like persistent fatigue that sleep doesn’t fix, lack of motivation to train, declining performance, or sleep disturbances. If these appear, take an extra rest day or reduce volume for a week. Most beginners need 24–72 hours between sessions that target the same muscle groups, though active recovery (light walking, stretching, or mobility work) on off days supports circulation and reduces stiffness.
A proper cool-down after each session supports recovery and maintains mobility:
Spine stretch. Child’s pose or cat-cow for 60–90 seconds to decompress the lower back.
Hip flexor and hamstring stretches. Kneeling hip flexor stretch and seated forward fold, 30–60 seconds per side.
Shoulder and chest stretches. Doorway pec stretch and cross-body shoulder stretch, 30 seconds per side.
Wrist stretches. Wrist flexion and extension stretches (palms down and fingers back, then palms up), 20–30 seconds each.
During exercises, maintain neutral spine alignment (avoid excessive arching or rounding in the lower back), especially during planks, hollow holds, and push-ups. For squats and lunges, make sure your knees track over your toes without caving inward. If you feel sharp pain (not general muscle fatigue or stretch discomfort), stop the exercise immediately and assess your form or consult a professional. Building strength slowly with good technique prevents most common calisthenics injuries.
Tracking Progress and Long-Term Beginner Calisthenics Development

Beginners often see noticeable strength improvements within the first 8 weeks of consistent training. One study showed that 8 weeks of calisthenics improved strength, reduced fat mass, and enhanced posture. Tracking your workouts in a simple log (notebook or phone app) helps you see these improvements and adjust your plan as needed.
Record the exercise, sets, reps, and any assistance used (band thickness, incline height) after each session. Every few weeks, review your log to identify patterns. If your reps are climbing steadily, you’re progressing well. If numbers stall for three or more sessions in a row, consider a regression to rebuild form or an extra rest day to ensure recovery.
Test these beginner benchmarks once per month to gauge overall progress:
Max strict pull-ups. Aim to reach 10 strict reps as a foundational pulling benchmark (may take 3–6 months starting from band assistance).
Plank and hollow hold duration. Work toward 60-second holds with perfect form before progressing to weighted or harder variations.
Push-up and squat capacity. Complete 3 sets of 15 reps with controlled tempo and full range of motion.
Advanced calisthenics skills like muscle-ups, handstand push-ups, L-sits, and planche variations often require 12 months or longer of consistent practice. Don’t rush. The beginner phase (typically the first 3–6 months) focuses on building movement quality, joint resilience, and the strength base that supports everything else. Once foundational exercises feel comfortable and your monthly benchmarks show steady progress, you’ll be ready to explore intermediate programming and more technical skills.
Final Words
Start with the 2-day full-body option (48–72 hours between) or the 3-day split. Use the core moves—push-ups, dips, inverted rows or assisted pull-ups, squats, planks, hollow holds, and short handstand practice—so every session hits the basics.
Warm up 6–10 minutes with light cardio, shoulder/hip mobility, and band activation. Follow the session order, rest 60–90 seconds, and progress when 3–4 sets of 10–15 reps at an RPE around 7 feel easier.
Use this calisthenics workout plan beginner as a simple template: log your sessions, protect recovery, and add small challenges each week. Keep it consistent and you’ll build strength and confidence.
FAQ
Q: What is a simple beginner calisthenics workout plan I can use now?
A: The beginner calisthenics workout plan is either a 2-day full-body (48–72 hours apart) or a 3-day split (upper, lower+core, skills). Use foundational moves and train 2–3 days per week.
Q: How many sets and reps should beginners do?
A: Beginners should start with 3 sets per exercise: push-ups 3×6–12, dips 3×4–8, inverted rows 3×6–12, squats 3×10–15, planks 3×20–60s, hollow holds 2–3×20–60s.
Q: How long and what should the warm-up include?
A: The warm-up should be 6–10 minutes: 3–5 minutes light cardio, shoulder/wrist/hip/spine mobility, band pull-aparts 2–3×15, and activation drills like scapular pull-ups and pike shoulder taps.
Q: How do I perform and regress push-ups, inverted rows, pull-ups, and squats?
A: The technique for push-ups, inverted rows, pull-ups, and squats combines clear cues and simple regressions: push-ups elbows ~45° with incline regression; rows change angle or bend knees; pull-ups use dead hang and band assist; squats hit parallel, feet slightly out.
Q: When should I progress and how?
A: You should progress when 3–4 sets of 10–15 reps feel easy at RPE ≤7. Progress by changing body angle, adding decline or single-leg work, reducing bands, or adding small weight.
Q: What does a simple weekly schedule look like for beginners?
A: A simple weekly schedule is either Option A: 2-day full-body (48–72 hours rest) or Option B: 3-day split (upper, lower+core, skills). Include 1–2 rest days and consider a deload every 4–6 weeks.
Q: How long should I rest between sets and between sessions?
A: You should rest 60–90 seconds between sets. Between sessions, rest 48–72 hours after full-body days or 24–72 hours before targeting the same muscle group again.
Q: How should I practice handstands and other beginner skills safely?
A: You should practice handstands after your warm-up with short, consistent attempts: 2–4 attempts or 3–5 sets of 10–60 seconds against a wall. Use EMOMs and keep skill volume low at first.
Q: How can beginners avoid injury and recover well?
A: Beginners can avoid injury by warming up, using good form, and watching overtraining signs. Recover with 24–72 hours rest, cool-down stretching for spine/hips/shoulders/wrists, good sleep, and periodic deloads.
Q: How should I track progress and what benchmarks should I aim for?
A: You should track progress in a simple training log and test monthly. Benchmarks to aim for: 10 strict pull-ups, 60-second plank and hollow holds; advanced skills often take 12+ months.
