

You don’t need a gym or weights to build real strength.
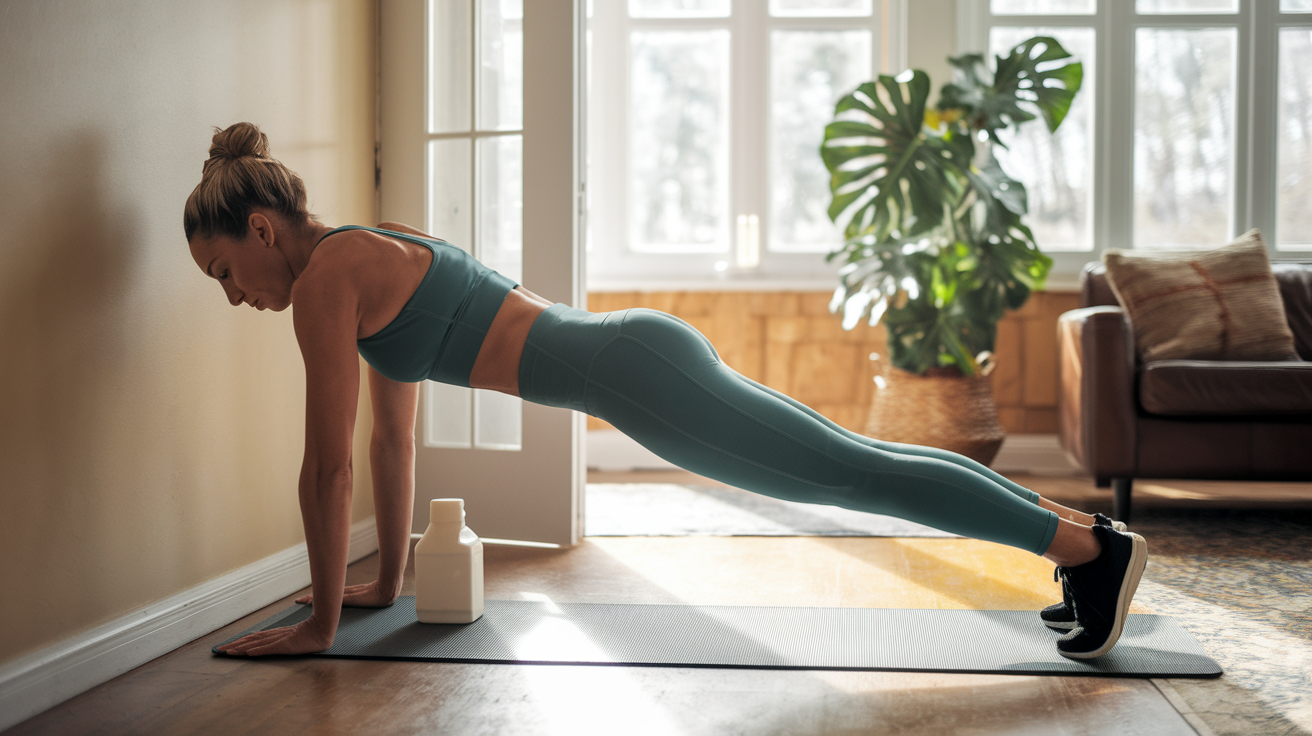
This 20-minute, no-equipment routine fits a living room, a park, or a hotel room.
It uses lunges, squats, push-ups, doorway rows (or a milk jug), planks, and easy regressions so you can start where you are.
I’ll show the warm-up, safer variations, and simple ways to progress so you get stronger without stress or confusion.
This post gives beginner-friendly bodyweight moves, clear technique cues, and a plan you can start today.
Beginner-Friendly Bodyweight Strength Movements You Can Start Today
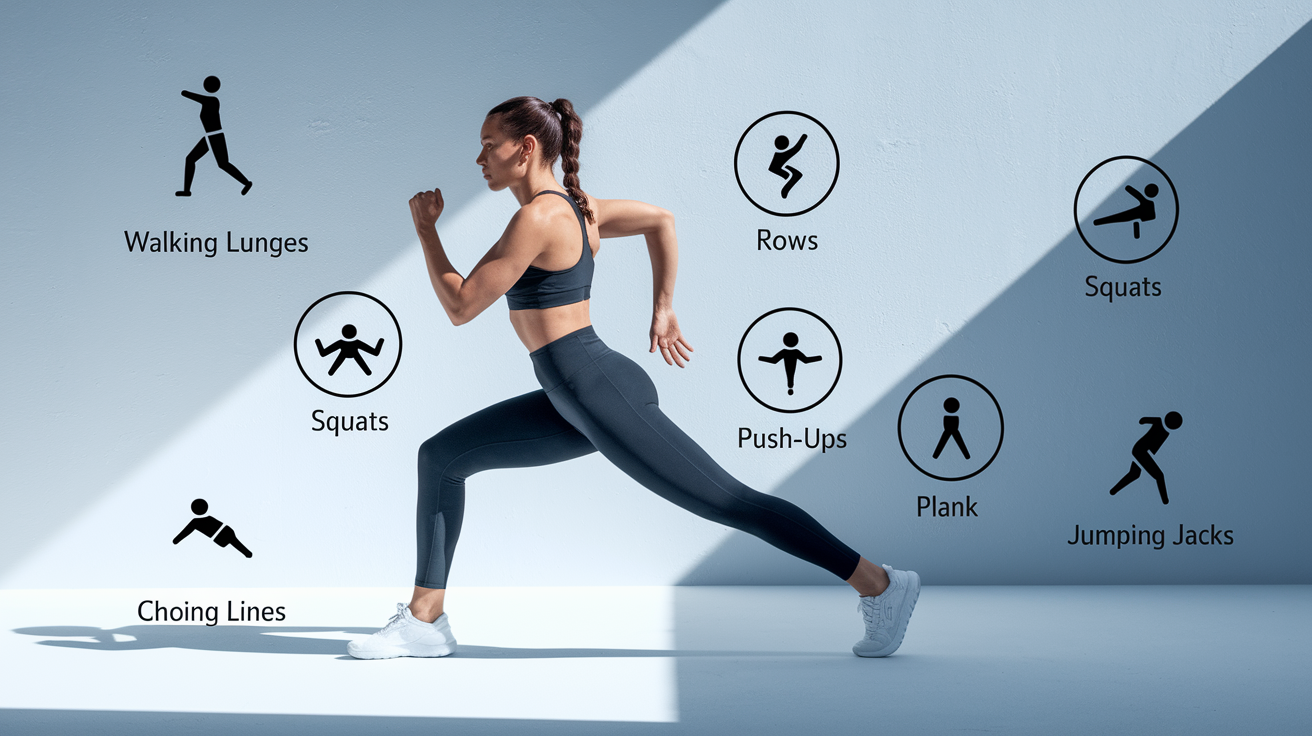
This 20-minute routine needs nothing but floor space. Set up in your living room, a park, or a hotel room without spending a dollar. The circuit includes 10 walking lunges per leg, 10 rows (grab a milk jug or suitcase for resistance), 20 bodyweight squats, 10 push-ups, a 15-second plank, and 30 jumping jacks. Run through it once, rest a minute, then repeat for two or three rounds depending on how you feel. Train two to four times a week, leaving about 48 hours between sessions so your muscles can recover.
Before you start, spend three to five minutes warming up. March in place, do some arm circles, swing your legs, or jog around the block. Get your heart rate up and prep your joints. After the workout, stretch what you just worked: hip flexors, chest, shoulders, hamstrings. Walking jacks replace jumping jacks if you need something gentler on your joints, and wall or elevated push-ups work when full ones feel too tough. Every exercise below has a beginner-friendly option so you can start where you are and level up when your form stays clean across all sets.
Here are ten bodyweight exercises that hit every major muscle group:
-
Wall Push-Up – Stand arm’s length from a wall, hands at shoulder height. Lower your chest toward the wall while keeping your body straight. Push back. Easier option: move closer to the wall.
-
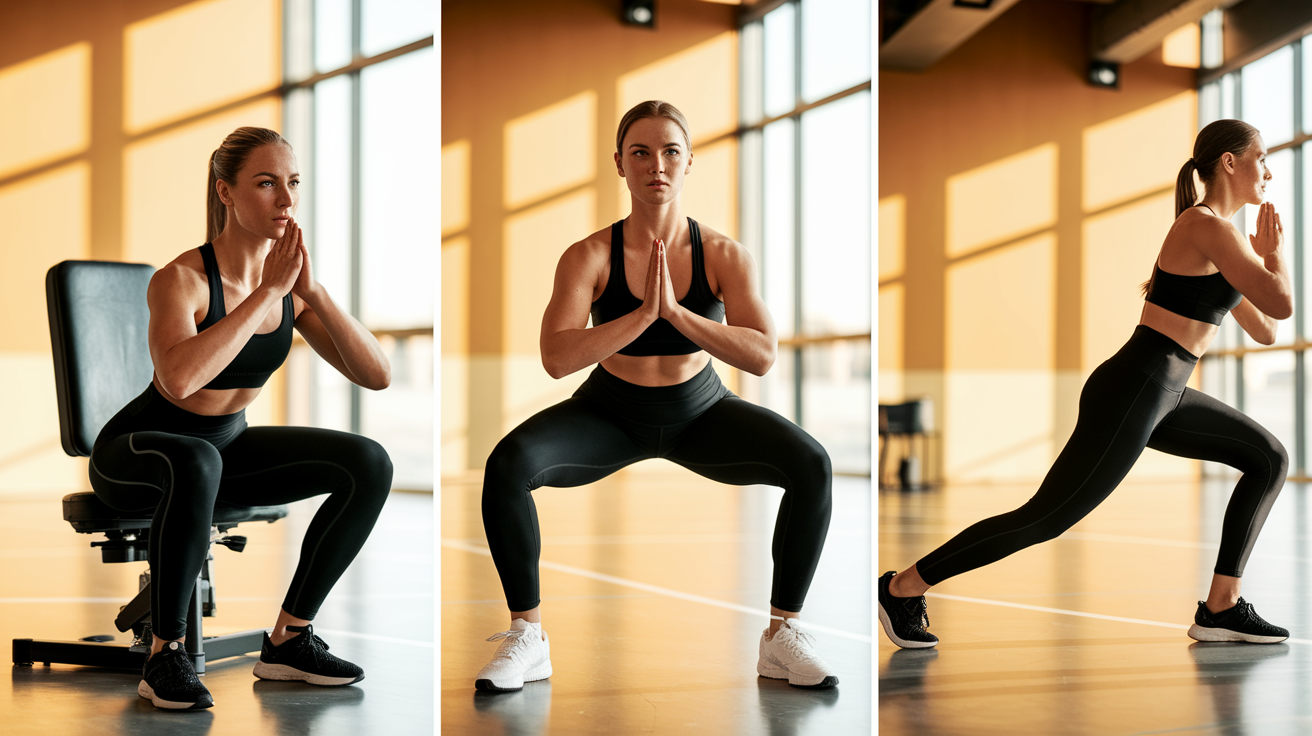
Assisted Bodyweight Squat – Hold a chair or doorframe for balance, sit your hips back, lower until your thighs are near parallel. Drive through your heels to stand. Easier option: don’t go as deep and hold the support the whole time.
-
Walking Lunge – Step forward, lower your hips until both knees hit roughly 90 degrees, then bring your back foot forward into the next lunge. Easier option: do stationary lunges or hold a wall for balance.
-
Doorway Row – Stand in a doorway, grip both sides at chest height, lean back with straight arms, then pull your chest toward your hands by squeezing your shoulder blades. Easier option: stand more upright.
-
Knee Plank – Start on your forearms and knees, form a straight line from head to knees. Pull your belly button toward your spine and hold without sagging. Easier option: use a cushion under your knees.
-
Hip Bridge – Lie on your back, knees bent, feet flat. Press through your heels to lift your hips until your body forms a diagonal line from knees to shoulders. Lower with control. Easier option: do smaller lifts and focus on squeezing your glutes at the top.
-
Dead Bug – Lie on your back in tabletop position with knees over hips and arms reaching up. Lower one arm overhead and extend the opposite leg, keeping your lower back pressed to the floor. Return and switch sides. Easier option: keep the non-working foot on the floor.
-
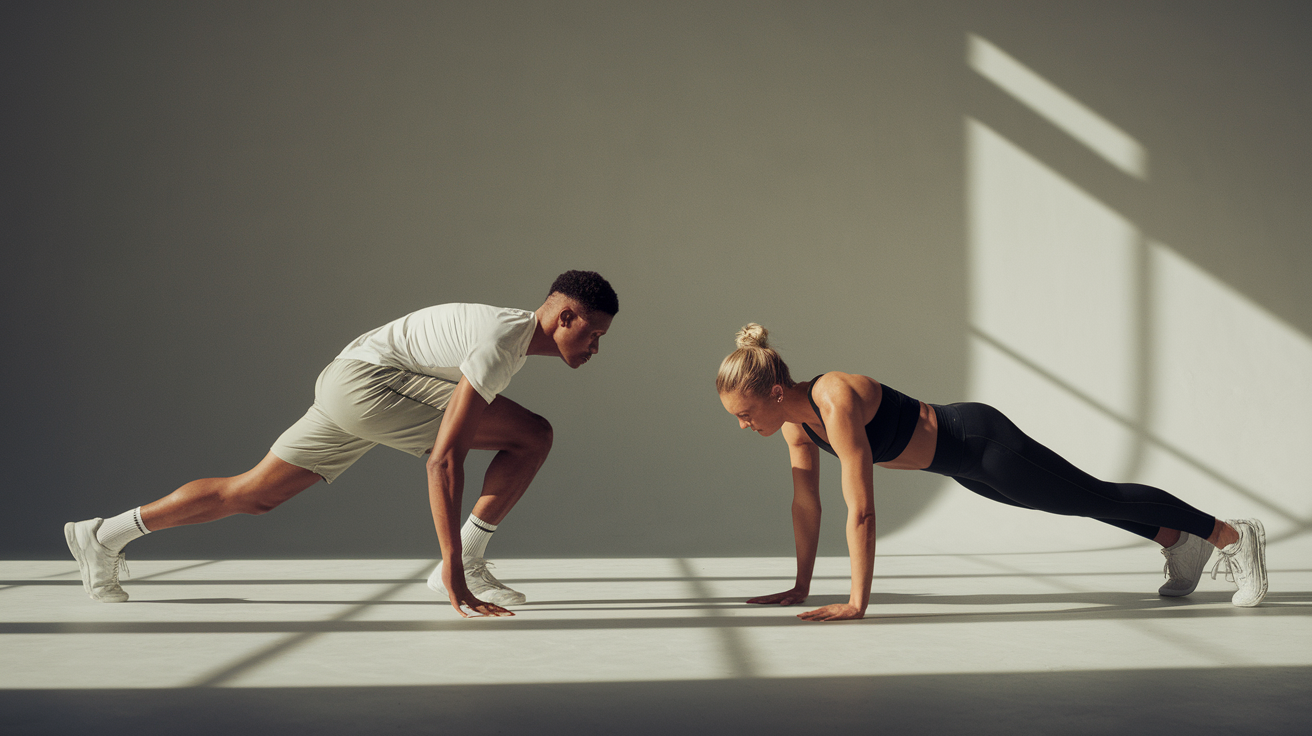
Mountain Climber – Start in a high plank and drive one knee toward your chest, then quickly switch legs for 30 seconds. Easier option: slow it down and step one foot at a time.
-
Lateral Lunge – Take a wide step to the side, sit your hips back on that leg while keeping the other straight, then push off to return. Easier option: take a shorter step and don’t sit as far back.
-
Bird Dog – Start on hands and knees, extend one arm forward and the opposite leg back until both are parallel to the floor. Hold for a breath, return, switch sides. Easier option: extend only your leg and leave your arm down.
You can do any of these in the space of a yoga mat. No barbells, no machines, no gym membership. Just consistent effort and attention to form.
Foundational Bodyweight Strength Cues and Safe Technique for Beginners
Form comes before volume. If you can’t keep good alignment through the last few reps, stop and rest instead of pushing through with sloppy technique. A neutral spine means your lower back holds its natural curve without excessive arching or rounding, your shoulders stack over your hips in standing moves, and your core stays braced like you’re about to be poked in the stomach. Breathe in during the easier phase (lowering into a squat or descending in a push-up) and exhale hard as you push, pull, or lift. Slow the lowering phase to a count of three, pause one second at the bottom, then drive up in one controlled count. That 3-1-1 tempo builds strength faster than rushing because your muscles work harder during the eccentric portion.
Keep your knees tracking over the middle of your foot during squats and lunges. If they cave in or bow out, lighten the movement by holding support or cutting your range of motion. Your chest should stay lifted and your gaze forward instead of staring at the floor, which helps maintain spinal alignment. Brace your core by pulling your belly button toward your spine before each rep and hold that tension throughout the set. If your lower back takes over during planks or leg raises, reset your position or switch to an easier version.
Common beginner mistakes:
- Holding your breath instead of breathing with the movement
- Letting your hips sag or spike up during planks
- Knees drifting way past your toes in a squat
- Shrugging your shoulders toward your ears during rows or push-ups
- Rushing reps to finish faster instead of controlling tempo
- Skipping the warm-up and jumping straight into working sets
Technique directly impacts how much strength you build and how safe you stay. Clean reps with controlled tempo recruit more muscle fibers, teach your nervous system better movement patterns, and reduce the chance of tweaking a joint. Progress happens when you can add one more rep, hold a position five seconds longer, or move to a harder version while keeping perfect form.
Lower-Body Progressions and Movement Mechanics for Beginners
Squat Progressions
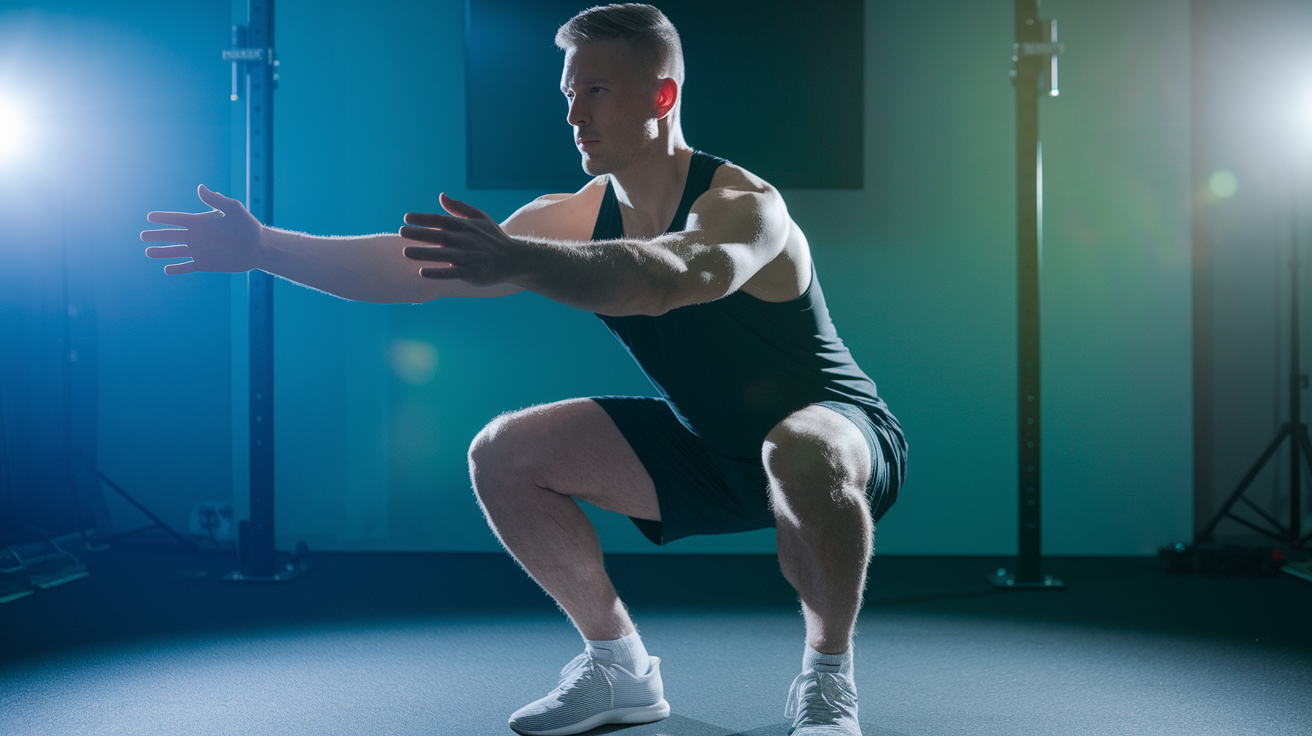
Start with an assisted bodyweight squat by holding a sturdy chair or countertop for balance. Sit your hips back like you’re aiming for a low chair, keep your chest up, and lower until your thighs approach parallel (or as far as your mobility allows without your heels lifting). Once you can do 15 clean reps barely touching the support, switch to a freestanding bodyweight squat with your hands reaching forward for counterbalance. The sample circuit calls for 20 bodyweight squats, which most beginners reach after two to four weeks of practice. If your knees or hips feel tight, work on ankle and hip mobility between sessions by spending 30 seconds in a deep squat hold with your hands supporting you, gently rocking side to side.
Drive through your whole foot, not just your toes. Imagine pushing the floor away rather than pulling yourself up. Your knees should track in line with your second toe throughout. If you notice your weight shifting onto your toes, sit back more deliberately at the start of each rep. Progress by slowing the descent to a four-count while keeping the ascent at one count. That eccentric emphasis builds strength faster than adding reps. Once 20 reps feel easy, try a narrow-stance squat or a 1.5 squat (lower all the way, come halfway up, drop back down, then stand fully). That counts as one rep and cranks up time under tension.
Lunge Variations
Lunges challenge balance and single-leg strength more than squats. Begin with a supported lunge by placing one hand on a wall or chair back, stepping forward with one leg, and lowering until both knees form roughly 90-degree angles. Your front knee should stay over your ankle, not drifting forward past your toes, and your back knee hovers an inch or two above the floor. Push through the heel of your front foot to return to standing. Once you can do 10 supported lunges per leg without wobbling, try freestanding forward lunges, then progress to reverse lunges, which feel more stable because you step backward.
The sample circuit uses 10 walking lunges per leg. Walking lunges demand more coordination because you step into the next lunge instead of returning to standing, but they also teach your body to move dynamically. Keep your torso upright and don’t lean forward, which shifts the load away from your glutes and onto your quads and knees. If walking lunges feel too hard, stick with stationary lunges and add one or two reps each week. Progress by holding a five-second pause at the bottom of each lunge or by adding a small pulse (lower an extra inch, rise an inch, then stand) before you return to the start.
Glute Bridges & Posterior Chain Basics
The hip bridge strengthens your glutes and hamstrings while teaching you to extend your hips without overarching your lower back. Lie on your back with knees bent and feet flat about hip-width apart, press through your heels, and lift your hips until your body forms a straight line from knees to shoulders. Squeeze your glutes hard at the top, hold one second, then lower with control. Don’t push your hips so high that your lower back arches. Your abs should stay slightly engaged the entire time. The sample routine suggests 15 reps across multiple sets, and once that feels easy, switch to single-leg hip bridges by extending one leg and pressing through the other heel.
Bodyweight good mornings offer another way to train the posterior chain if lunges bother your knees. Stand with feet hip-width apart, place your hands behind your head, bend your knees slightly, then hinge forward at the hips until your torso is nearly parallel to the floor. Keep your spine neutral and your core braced, then drive your hips forward to stand. This mimics the hinge pattern you’ll use for deadlifts later, and it strengthens the lower back, glutes, and hamstrings without loading your knees. Progress glute bridges by adding a three-second hold at the top or doing single-leg versions, and progress good mornings by slowing the eccentric phase to a four-count.
Upper-Body Strength Development Using Bodyweight Progressions

Push-Up Progression Ladder
Wall push-ups are step one. Stand arm’s length from a wall, place your hands at shoulder height, and lower your chest toward the wall by bending your elbows, keeping your body straight from head to heels. Push back to start. Once you can complete 15 wall push-ups with solid form, move to an elevated push-up by placing your hands on a sturdy countertop or bench. The lower the surface, the harder it gets. When you can do 12 elevated push-ups at knee height, drop to your knees on the floor for knee push-ups, keeping your body straight from head to knees and lowering your chest until it hovers a fist’s height above the floor. The sample circuit calls for 10 push-ups, and most beginners reach that milestone with knee or elevated versions within four to six weeks.
Full push-ups require holding a high plank position and lowering your chest all the way to the floor before pressing back up. Keep your elbows at a 45-degree angle rather than flaring them straight out, which puts unnecessary strain on your shoulders. Your core should stay braced so your hips don’t sag or pike up. If you can do one or two full push-ups but not ten, perform as many full reps as possible, then immediately drop to your knees and finish the set. That mixed-rep approach builds strength faster than sticking with knee push-ups alone. Progress by adding one full rep each week, slowing the descent to a three-count, or holding the bottom position for two seconds before pressing up.
Beginner Row Options
Rows train the pulling muscles in your upper back, which balance the pushing work from push-ups and help prevent rounded shoulders. The doorway row lets you train at home without equipment. Stand in a doorway, grip both sides of the frame at chest height with straight arms, lean back until your body forms a diagonal line, then pull your chest toward your hands by squeezing your shoulder blades together. Keep your core tight and don’t let your hips sag. The farther you lean back, the harder it becomes. If doorway rows feel too hard, stand more upright and pull from a steeper angle.
The sample circuit includes 10 dumbbell rows, but you can substitute a milk jug, suitcase, or any object with a handle. Stand with one hand braced on a bench or chair, hinge forward at the hips so your torso is nearly parallel to the floor, and pull the weight toward your hip by driving your elbow back and squeezing your shoulder blade. Lower with control and don’t rotate your torso. If you don’t have any weights, load a backpack with books or water bottles. Progress doorway rows by leaning farther back or slowing the tempo, and progress weighted rows by adding reps or using a heavier object.
Assisted Pull-Up & Grip Foundations
Pull-ups require significant strength, so beginners benefit from starting with scapular pulls and negative pull-ups. Scapular pulls teach you to engage your lats before you bend your elbows. Hang from a bar with straight arms, then pull your shoulder blades down and back without bending your elbows, creating a small lift in your body. Hold two seconds, relax, and repeat for 8 to 10 reps. Once you can do controlled scapular pulls, add negative pull-ups by jumping or stepping up to the top position of a pull-up, then lowering yourself as slowly as possible (aim for a five-second descent). Negative reps build strength through the full range of motion even when you can’t yet pull yourself up.
Assisted pull-ups use a resistance band looped over the bar or a partner holding your feet to reduce how much bodyweight you’re lifting. Focus on pulling your elbows down toward your hips rather than thinking about lifting your chin, which keeps the work in your lats instead of your arms. Grip strength builds naturally through rows, dead bugs where you hold light weights, and timed hangs from a pull-up bar. Start with 10 to 20-second hangs and add five seconds each week.
Key upper-body alignment cues:
- Shoulders stay down and back, never hunched toward your ears
- Elbows track close to your body during push-ups and rows
- Wrists stay stacked under your shoulders in plank-based movements
- Chest leads the movement in rows, not your arms
- Core stays braced to prevent your lower back from arching
Core Stability Training Through Progressive Bodyweight Patterns
Core training for beginners centers on stability rather than crunches. The goal is resisting unwanted movement (prevent your spine from flexing, extending, or rotating) while your arms and legs move. That type of training transfers directly to better posture, safer lifting, and stronger performance in every other exercise. The sample circuit includes a 15-second plank, which most beginners can hold on their knees before progressing to a standard forearm or high plank. Start with three sets of 15 to 20 seconds, adding five to ten seconds each week as your core adapts.
Plank Variations
Knee planks reduce the lever length, making the exercise easier while still teaching proper alignment. Start on your forearms and knees, forming a straight line from head to knees, and pull your navel toward your spine. Once you can hold a knee plank for 45 seconds without your hips sagging, move to a standard forearm plank with your legs straight and your body forming a line from head to heels. Keep your glutes lightly squeezed and your abs engaged. If your lower back arches, your core isn’t bracing hard enough. Side planks train lateral stability. Lie on your side, prop yourself up on one forearm, and lift your hips so your body forms a straight line from head to feet. Beginners can stack their knees instead of their feet to make it easier.
Progress planks by adding shoulder taps in a high plank position (lift one hand to tap the opposite shoulder while keeping your hips square) or by lifting one leg a few inches off the floor and holding for 10 to 15 seconds before switching sides. Both force your core to work harder to prevent rotation and maintain stability.
Dead Bug
The dead bug teaches you to keep your lower back flat against the floor while moving your arms and legs, which is exactly what your core needs to do during squats, lunges, and rows. Lie on your back with your knees bent at 90 degrees over your hips and your arms reaching toward the ceiling. Press your lower back into the floor, then slowly lower your right arm overhead while extending your left leg until both hover just above the floor. Pause, return to start, and switch sides. Do two to three sets of 10 reps, focusing on controlled movement rather than speed. If your lower back lifts off the floor, reduce your range of motion or keep the non-working leg bent with the foot on the floor.
Dead bugs also work well with light weights. Hold a three- to five-pound dumbbell in each hand to increase the challenge. Progress by slowing the tempo to a four-count descent or by pausing three seconds when your arm and leg are extended.
Bird Dog
Bird dogs build stability from a kneeling position, which many beginners find easier to control than lying down. Start on your hands and knees with your wrists under your shoulders and your knees under your hips. Keep your spine neutral, then extend your right arm forward and your left leg back until both are parallel to the floor. Hold two to three seconds, focusing on keeping your hips level and your core braced, then return and switch sides. Do two to three sets of 15 reps, moving deliberately rather than rushing. If you lose balance, extend only your leg and leave your arm on the floor until you build more stability.
Progress bird dogs by moving your extended limbs slightly out to the sides (increases instability) or by holding a light weight in your extended hand. Both force your core to work harder to prevent rotation.
Breathing and bracing cues for core work:
- Exhale as you extend your limbs in dead bugs and bird dogs
- Keep a steady breathing rhythm during planks (don’t hold your breath)
- Brace your core before each rep by pulling your belly button toward your spine
- Imagine resisting a gentle push to your torso from any direction
Warm-Up and Mobility Routines That Support Bodyweight Strength Training

Dynamic warm-ups prepare your muscles and joints for the work ahead while raising your heart rate and core temperature. Static stretching (holding a stretch for 30 seconds or more) belongs after your workout, not before, because it temporarily reduces muscle tension and can decrease power output. Spend three to five minutes warming up before every session, and consider adding a warm-up round of your workout exercises using easier versions. For example, if your workout includes knee push-ups, do a set of wall push-ups during your warm-up to rehearse the movement pattern at lower intensity.
Joint mobility drills lubricate the joints and improve range of motion without fatiguing your muscles. Shoulder circles, wrist rolls, and ankle circles each take 30 to 60 seconds and make a noticeable difference in how smoothly you move through push-ups, planks, and lunges. Leg swings (forward and back, then side to side) loosen your hips and prep your legs for squats and lunges. Torso twists wake up your spine and core, especially if you’ve been sitting for hours. Arm circles with your arms extended to the sides activate your shoulders and upper back, which helps stabilize your body during rows and push-ups.
Here’s a simple six-step warm-up you can use before any bodyweight session:
- March in place or jog lightly for 60 to 90 seconds to raise your heart rate.
- Do 30 to 60 seconds of shoulder circles, rolling forward and backward.
- Do 8 to 12 leg swings per leg (forward and back, then side to side).
- Complete 10 to 20 arm circles in each direction with your arms extended.
- Do 10 to 15 torso twists, rotating your upper body side to side.
- Finish with an easy warm-up round of your workout exercises at half effort.
Mobility work between training sessions also supports long-term progress. Spend five to ten minutes on off days working through a deep squat hold, hip flexor stretches, or thoracic spine rotations to address common tight spots. Better mobility means you’ll hit deeper ranges of motion with cleaner form, which recruits more muscle and reduces injury risk. If your hips or ankles feel stiff, add 60 seconds of ankle circles and hip circles to your daily routine. Consistency matters more than intensity when building mobility.
Sample Beginner-Friendly Bodyweight Strength Workouts and Progressions
| Routine | Structure | Notes |
|---|---|---|
| 20-Minute Full-Body Circuit | 3 circuits: 10 walking lunges/leg, 10 rows, 20 squats, 10 push-ups, 15-second plank, 30 jumping jacks. Rest 1–2 minutes between circuits. | Do 2 circuits your first week, add a 3rd when you can complete 2 rounds with solid form. Train 2–4x/week with 48 hours between sessions. |
| Lower-Body Focus (15 Minutes) | 3 sets: 15 bodyweight squats, 10 walking lunges/leg, 15 hip bridges, 10 bodyweight good mornings. Rest 60–90 seconds between sets. | Great for days when your upper body is sore. Pair with light core work (2 sets of dead bugs and bird dogs) if you have extra time. |
| Upper-Body & Core (15 Minutes) | 3 sets: 10 push-ups, 10 doorway rows, 30-second plank, 10 dead bugs. Rest 60–90 seconds between sets. | Use knee or elevated push-ups if needed. Focus on slow, controlled reps. Add mountain climbers (20 seconds) between sets for a cardio boost. |
The 20-minute circuit above is the core beginner routine. It trains every major muscle group in a single session, fits into a busy schedule, and requires no equipment beyond a milk jug or suitcase for rows. Do the circuit two times during your first week, focusing on learning the movements and keeping good form. If two circuits leave you feeling capable of more, add a third the following week. Once three circuits feel manageable, start applying progressive overload by adding one rep to each exercise, cutting rest periods by 10 to 15 seconds, or moving to harder versions like full push-ups or single-leg hip bridges.
Training frequency depends on your recovery and schedule. Two sessions per week maintain strength, three sessions build it, and four sessions speed up progress for most beginners. Always leave about 48 hours between sessions that train the same muscle groups. For example, if you do the full-body circuit on Monday, wait until Wednesday or Thursday before repeating it. On your off days, go for a walk, do light stretching, or try a recovery-focused activity like yoga. Active recovery keeps blood flowing to sore muscles without adding fatigue. After four to six weeks on the same routine, check your progress. If you can complete all sets with clean form and the workout no longer feels challenging, increase difficulty by adding reps, slowing tempo, or introducing new versions.
Scaling, Regressions, and Safe Progression for Bodyweight Beginners

Scaling means adjusting an exercise to match your current strength level without skipping it entirely. Regressions make a movement easier, while progressions make it harder. Most beginners start with one or two regressions per exercise, practice for several weeks, then move toward the standard version as strength and confidence grow. If a movement feels too hard, regress it. If it feels too easy, progress it. The middle ground (where the last two or three reps of each set feel challenging but doable) is where strength builds fastest.
Slow eccentrics are one of the simplest and most effective progression tools. Lower yourself over three to four seconds during the descending phase of any movement (whether that’s a squat, lunge, push-up, or row), then drive up at normal speed. That added time under tension recruits more muscle fibers and improves control, which translates to better form and faster strength gains. Cutting rest periods between sets or circuits also increases difficulty without changing the exercises. If you currently rest 90 seconds, try dropping to 75 seconds, then 60 seconds over the next few weeks. Your heart rate stays higher and your muscles work harder to recover between efforts.
Five common regressions and five progressions you can apply to almost any bodyweight exercise:
- Regression: Cut range of motion (shallow squats, partial lunges)
- Regression: Add support (hold a chair, use a wall, keep a knee down)
- Regression: Slow the tempo to improve control (3-second descents)
- Regression: Drop reps or time (10 reps instead of 15, 10-second plank instead of 30)
- Regression: Use an easier version (walking jacks instead of jumping jacks)
- Progression: Increase reps or hold time (+1 rep per week, +5 seconds on planks)
- Progression: Add pauses or pulses at the hardest point
- Progression: Switch to harder versions (knee push-ups to full push-ups)
- Progression: Slow the eccentric phase to 4–5 seconds
- Progression: Cut rest periods by 10–15 seconds per week
The four- to six-week adaptation window matters because your nervous system and muscles need time to respond to a new stimulus. Changing your routine every week prevents your body from adapting and limits progress. Stick with the same exercises and rep schemes for at least a month, focusing on small improvements each session. After six weeks, you can add new movements, increase volume, or adjust intensity, but only if you’ve truly mastered the basics. Most beginners benefit from repeating the same simple routine for two to three months before adding complexity.
Beginner Nutrition and Recovery to Support Bodyweight Strength Gains

Training accounts for roughly 10 to 20 percent of your results. Nutrition makes up about 80 percent. You can do perfect workouts three times per week and still see minimal progress if your eating habits don’t support recovery and muscle growth. That doesn’t mean you need a complicated meal plan or expensive supplements. It means you need to eat enough protein, get adequate calories to fuel your training, and build habits that feel sustainable for months, not just days. Protein supports muscle repair and growth. Aim for a palm-sized portion of protein at each meal: chicken, fish, eggs, Greek yogurt, beans, tofu, or a protein shake all count. Most beginners do well with 0.7 to 1 gram of protein per pound of body weight daily, though even hitting 100 grams per day makes a noticeable difference if you’ve been eating far less.
Slow down when you eat. It takes about 20 minutes for your brain to register fullness, so eating quickly often leads to overeating before your body realizes it’s satisfied. Put your fork down between bites, chew thoroughly, and skip distractions like scrolling through your phone while eating. Track your portions for a week to get a sense of how much you’re actually consuming. Many people underestimate calories when trying to build muscle and overestimate when trying to lose fat. Cut liquid calories from soda, juice, and sweetened coffee drinks, which add up fast and don’t make you feel full. Get vegetables and fruit at every meal for fiber, vitamins, and minerals that support recovery. Be mindful of fats and carbs by measuring servings rather than pouring freely. Both are essential, but portion sizes matter.
Recovery happens between workouts, not during them. Sleep is the most powerful recovery tool you have. Aim for seven to nine hours per night, and keep a consistent sleep schedule even on weekends. Poor sleep raises cortisol, cuts testosterone, impairs muscle repair, and makes every workout feel harder than it should. Hydration also affects performance and recovery. Drink enough water that your urine stays light yellow throughout the day. The 48-hour rest guideline between strength sessions gives your muscles time to repair and adapt. On off days, light movement like walking, stretching, or easy yoga keeps blood flowing to sore muscles without adding fatigue. Stress management matters too. Chronic stress from work, relationships, or lack of downtime can stall progress even when your training and nutrition are solid. Find small daily habits that help you relax: ten minutes of deep breathing, a short walk outside, or journaling before bed all help lower stress and improve recovery.
Final Words
Start today with the 20-minute anywhere routine: three circuits using the sample set (10 walking lunges per leg, 10 rows, 20 squats, 10 push-ups, 15-second plank, 30 jumping jacks). Aim for 2–4x/week and always include a short warm-up and cooldown.
Use simple regressions and progressions, like wall push-ups, assisted squats, walking jacks, or add reps and reduce rest to keep things safe and moving forward.
Stick with recovery and smart nutrition, and these bodyweight strength exercises for beginners will help you get more consistent and stronger. You’re set to keep improving.
FAQ
Q: How can I start strength training with just my bodyweight?
A: You can start strength training with just your bodyweight by picking 6–8 basic moves (squats, lunges, push-ups, rows, planks, bridges), doing a 20-minute, 3-circuit routine 2–4×/week, with warm-up and easy modifications.
Q: What is the 3 3 3 rule for weight lifting?
A: The 3‑3‑3 rule for weight lifting is performing three sets of three heavy reps for strength, often across three core lifts, focusing on quality reps with full rest between sets to lift heavier safely.
Q: What is the 5 5 5 30 rule?
A: The 5‑5‑5‑30 rule typically means five repetitions for five sets across five movements with about 30 seconds rest, used to build muscular endurance and metabolic conditioning.
Q: What’s the best exercise for type 2 diabetes?
A: The best exercise for type 2 diabetes is a regular mix of aerobic activity (brisk walking) and resistance work (bodyweight squats, push-ups), which helps improve blood sugar; check with your clinician before starting.
